Article Plan: Lightning McQueen Eyes and Mouth Chocolate Mold Instructions PDF
This detailed guide outlines crafting iconic Cars character features from chocolate! We’ll cover mold usage, techniques, and resources for stunning McQueen creations.
Are you ready to bring the high-speed world of Radiator Springs to your dessert table? This comprehensive guide focuses on utilizing Lightning McQueen eyes and mouth chocolate molds to create incredibly detailed and delightful treats. Whether you’re a seasoned chocolatier or a beginner, we’ll navigate the process step-by-step.
From selecting the perfect chocolate to mastering demolding techniques, this PDF-focused instruction set will empower you to craft show-stopping cakes, cupcakes, and more. Prepare to rev your engines and embark on a sweet adventure!
What are Lightning McQueen Chocolate Molds?
Lightning McQueen chocolate molds are specialized tools designed to replicate the iconic facial features of the beloved Cars character. Typically made from food-grade silicone or plastic, these molds come in two primary forms: molds for his distinctive eyes and separate molds for his signature, wide mouth.
These molds allow for precise chocolate shaping, enabling you to create realistic details for cakes, cupcakes, or standalone chocolate decorations. They are readily available online and often used in themed birthday celebrations.
Why Use a Chocolate Mold?
Employing a chocolate mold offers unparalleled precision and efficiency when crafting detailed designs like Lightning McQueen’s features. Hand-sculpting such intricate shapes is time-consuming and requires significant artistic skill. Molds guarantee consistent results, replicating the character’s look flawlessly each time.
They simplify the decorating process, especially for beginners, and allow for mass production if needed. Molds also minimize chocolate waste, ensuring a professional finish for cakes and treats, elevating any Cars-themed event!
Materials Needed
To begin your Lightning McQueen chocolate creations, gather essential supplies! You’ll require the specific eyes and mouth chocolate molds, of course; High-quality chocolate – dark, milk, or white – is crucial. A microwave-safe bowl or double boiler for melting is needed, alongside a spatula for stirring and pouring.
Don’t forget coloring oils or candy melts to achieve McQueen’s vibrant red and other signature hues. Release agent spray (optional) and parchment paper complete the basic toolkit for successful molding!
Chocolate Type Selection
Choosing the right chocolate impacts your McQueen features’ appearance and taste! High-quality couverture chocolate offers superior shine and snap, ideal for detailed molds. Dark chocolate provides a bold contrast, while milk chocolate offers sweetness. White chocolate is perfect for mixing colors.
Candy melts are a convenient option, especially for vibrant hues, but may lack the same refined texture. Consider the desired effect – a professional finish benefits from couverture, while simpler projects suit candy melts.
Mold Specifics & Sizing
Lightning McQueen eye and mouth molds vary in detail and size! Typically, eye molds create individual lenses, requiring assembly. Mouth molds often feature teeth and a grinning shape. Silicone molds are flexible, aiding easy release, while plastic molds are more rigid.
Check dimensions before purchasing – larger molds suit cake decorations, smaller ones are perfect for treats. Ensure the mold’s depth accommodates your desired chocolate thickness for a sturdy final product.
Tools Required
Successful McQueen chocolate creation demands specific tools! You’ll need a double boiler or microwave-safe bowl for melting, silicone spatulas for stirring and pouring, and piping bags for precise chocolate application. Toothpicks are essential for releasing air bubbles.
A mold release spray (optional) prevents sticking. Cooling racks are vital for setting. For cake application, offset spatulas and decorating tools enhance presentation. Consider a chocolate thermometer for tempering precision.
Preparing the Mold
Proper mold preparation is crucial for clean releases! Begin by thoroughly washing the Lightning McQueen eyes and mouth mold with warm, soapy water. Ensure all residue is removed, then completely dry it – even a tiny drop of water can ruin the chocolate.
Inspect for any debris. If using a release agent, apply a very thin, even coat. Allow it to dry completely before pouring chocolate, preventing sticking and preserving intricate details.
Cleaning and Drying the Mold
Maintaining mold hygiene is paramount! After each use, immediately wash the Lightning McQueen mold with warm, soapy water. A soft brush helps reach detailed areas like the eyes and mouth contours. Rinse thoroughly to remove all soap traces, as residue impacts chocolate quality.
Drying is critical – use a lint-free cloth or allow air drying completely. Moisture causes sticking and affects the final chocolate piece’s appearance. Store in a dry, dust-free environment.
Applying Release Agent (if necessary)
For intricate molds like Lightning McQueen’s features, a release agent can be beneficial. While high-quality silicone molds often don’t require it, a very light coating of vegetable shortening or mold release spray ensures clean demolding.
Apply sparingly with a soft brush, ensuring even coverage in the eyes and mouth details. Excess agent creates a dull finish. Buff gently with a clean cloth to remove any visible residue before pouring chocolate.
Melting the Chocolate
Precise melting is crucial for smooth chocolate features. Use a double boiler or microwave in 30-second intervals, stirring thoroughly between each. Avoid overheating, as this affects temper and causes seizing.
For vibrant McQueen colors, melt white chocolate and add oil-based candy colors. Dark chocolate works well for outlining. Ensure no water enters the chocolate, as it will cause it to seize and become unusable for molding.
Tempering Chocolate (for optimal shine & snap)
Tempering yields professional-looking, glossy McQueen features with a satisfying snap. Seed tempering involves adding chopped, tempered chocolate to melted chocolate, cooling it, and stirring until stable.
Alternatively, use a chocolate tempering machine for consistent results. Proper tempering ensures the cocoa butter crystals align, preventing bloom (white streaks) and creating a smooth, shiny finish essential for detailed molds like Lightning McQueen’s eyes and mouth.

Coloring Chocolate (achieving McQueen’s colors)
Replicating McQueen’s vibrant red requires oil-based candy coloring. Water-based colors can seize the chocolate! Start with a small amount, mixing thoroughly. For a true red, consider a blend of red and a tiny touch of orange.
Yellow accents for details can be achieved similarly. Test the color on a small chocolate piece before pouring into the molds. Remember, less is more – you can always add more color, but removing it is impossible!
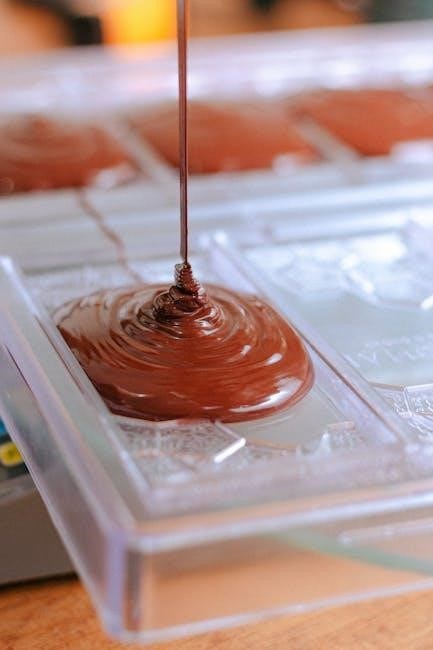
Pouring the Chocolate
Gently pour the tempered chocolate into the Lightning McQueen eye and mouth molds. Avoid forceful streams, as this introduces air bubbles. A piping bag or a small pouring spout works best for precision. Tap the mold lightly on the counter after filling to release trapped air.
Ensure chocolate reaches all crevices of the detailed molds. Overfilling can create messy edges during demolding, so pour cautiously and observe the chocolate’s flow.
Filling the Eyes Mold
Carefully pour the melted, tempered chocolate into each eye cavity of the mold. Pay close attention to capturing the intricate details – the shape and depth are crucial for accurate representation. Use a small spatula or piping bag for controlled filling.
Ensure complete coverage, reaching into every corner of the eye mold. Gently tap the mold to dislodge any trapped air bubbles, guaranteeing a smooth, flawless finish for McQueen’s expressive eyes.
Filling the Mouth Mold
The mouth mold requires precision; slowly pour tempered chocolate into its complex shape. Focus on filling the teeth details and the characteristic grin of Lightning McQueen. A piping bag is highly recommended for this step, offering superior control.
Gently vibrate the mold to release trapped air and ensure the chocolate reaches all crevices. Overfilling can cause issues during demolding, so aim for a level surface before cooling begins.
Avoiding Air Bubbles
Air bubbles detract from a professional finish; prevent them by gently tapping the filled mold on a stable surface. This releases trapped air without disturbing the chocolate’s setting process. Using tempered chocolate, poured at the correct temperature, minimizes bubble formation.
A toothpick can carefully pop any stubborn bubbles that appear. Avoid vigorous shaking, as this introduces more air. Smooth, consistent pouring also contributes to a bubble-free result, enhancing detail.
Cooling and Setting
Allow the filled molds to cool undisturbed at room temperature initially, preventing thermal shock. This gradual cooling promotes even setting and minimizes cracking. Avoid drafts or rapid temperature changes during this phase. Setting time varies based on chocolate type and room temperature—typically 20-30 minutes.
Once partially set, a slight sheen will appear. Further chilling in the refrigerator accelerates the process, but isn’t always necessary for smaller features. Patience ensures clean demolding.
Refrigeration Time
For optimal firmness and easy demolding, refrigerate filled molds for 15-20 minutes. This is particularly crucial for larger or intricately detailed McQueen features like the mouth. Ensure the refrigerator isn’t excessively cold, as this can cause condensation and affect the chocolate’s shine.
Check for complete solidification – the chocolate should release cleanly from the mold edges. Avoid prolonged refrigeration, which may lead to bloom (white streaks) on the chocolate’s surface.
Demolding Techniques
Gently flex the mold away from the chocolate edges, rather than forcing it out. A light tap on the mold’s underside can assist release, especially for detailed areas like McQueen’s eyes. Avoid using sharp objects, which can damage the chocolate or the mold itself.
If sticking occurs, briefly return the mold to the refrigerator for a few minutes. Patience is key – slow and steady pressure yields the best results, preserving the chocolate’s form.
Assembling the Features
Once demolded, carefully position the chocolate eyes and mouth onto your cake or treats. A small dab of melted chocolate acts as edible “glue,” securing the features in place. Ensure the surface is cool but not frozen for optimal adhesion.
Consider using tweezers for precise placement, especially with smaller details. Allow the attaching chocolate to fully set before handling or decorating further, preventing shifting or breakage.
Attaching Eyes to Cake/Treats
For attaching the Lightning McQueen eyes, apply a tiny amount of melted chocolate to the back of each eye piece. Gently press onto the desired location on your cake or treat, holding for a few seconds until it begins to set.
Maintain consistent spacing and angle for a realistic look. If using fondant, lightly moisten the surface before applying the chocolate for better adhesion. Ensure the cake is stable to prevent sliding.

Attaching Mouth to Cake/Treats
Securing the McQueen mouth requires a bit more chocolate due to its larger surface area. Apply a generous, yet neat, line of melted chocolate along the back of the mouth piece.
Carefully position it onto the cake, ensuring proper alignment with the eyes. Press firmly but gently, supporting the chocolate until it firms up. For fondant, a thin layer of buttercream underneath aids adhesion. Consider using toothpicks for temporary support during setting.
Decoration Ideas
Beyond basic attachment, enhance your McQueen treats! Use red buttercream to mimic his racing stripes on cakes or cupcakes. Scatter “tire” sprinkles around the base for a Radiator Springs feel.
Fondant can create a full McQueen body, with the chocolate features adding realistic detail. Consider a “finish line” checkered pattern. For cookies, pipe chocolate “speed lines” emanating from the mouth. A sprinkle of edible glitter adds a touch of racing glamour!
Creating a Lightning McQueen Cake
Transform a simple cake into a McQueen masterpiece! Start with a rectangular cake, carving it into a car shape. Cover in red fondant, smoothing for a sleek finish. Utilize the chocolate eyes and mouth as focal points, precisely positioned for expression.
Add fondant tires and spoiler. Pipe black buttercream for racing stripes and details. Consider a “dirt” effect with crushed cookies around the base. A checkered flag elevates the racing theme, completing the dynamic design!
Using with Fondant & Other Decorations
Enhance your creations by combining chocolate features with fondant! Apply the molded eyes and mouth to fondant car bodies or cupcakes for a professional look. Fondant tires, spoilers, and racing stripes complement the chocolate details beautifully.
Explore edible markers for fine lines and details. Crushed cookies create realistic “dirt” effects. Consider incorporating miniature flags or character figurines. These additions elevate your McQueen-themed treats, adding depth and visual appeal!
Troubleshooting

Encountering issues? Chocolate cracking often stems from temperature fluctuations – ensure stable melting and cooling. If molds stick, a thin layer of cocoa butter or a release agent is crucial. Air bubbles can be minimized by gently tapping the mold after pouring.
Uneven chocolate distribution? Re-melt and carefully re-pour. Dull finishes indicate improper tempering. Don’t despair! Practice and patience yield perfect McQueen features. Experiment with different chocolate types for optimal results.
Chocolate Cracking
Cracking during cooling is a common frustration! Rapid temperature changes are the primary culprit. Ensure a consistent, cool environment – avoid drafts or direct sunlight. Properly tempered chocolate is less prone to cracking, possessing greater flexibility.
Gentle handling during demolding is vital. If cracks appear, a light brush of melted chocolate can often repair minor imperfections. Consider adding a small percentage of fat (like cocoa butter) to the chocolate for increased pliability.
Mold Sticking
Sticking can ruin delicate chocolate details! Thoroughly prepare the mold with a release agent – cocoa butter is ideal, applied thinly and evenly. Ensure the chocolate is fully cooled and set before attempting demolding; patience is key.
If sticking occurs, gently flex the mold, avoiding forceful pulling. A brief stint in the freezer (5-10 minutes) can sometimes aid release. Silicone molds generally release chocolate more easily than rigid plastic.
Finding the PDF Instructions
Locating detailed instructions can enhance your experience! Check the mold manufacturer’s website; many offer downloadable PDF guides with step-by-step visuals. Online retailers like Amazon or specialty cake decorating stores often provide links to instructions.
Search online using specific keywords: “Lightning McQueen chocolate mold instructions PDF;” Explore Disney Cars fan forums and cake decorating communities – members frequently share resources and tips. Look for tutorials on video platforms too!
Online Resources for the Mold
Numerous online platforms offer support and inspiration! Explore cake decorating websites and blogs for tutorials featuring similar molds and chocolate techniques. Pinterest is a treasure trove of visual ideas for Lightning McQueen-themed treats.
YouTube channels dedicated to cake decorating showcase detailed demonstrations. Check out online forums dedicated to Disney Cars fans; they often share mold sources and decorating tips. Retailer websites like Amazon and specialty baking stores also provide helpful customer reviews.
Manufacturer Websites
Directly accessing manufacturer websites provides crucial information! Hot Wheels Fusion Factory, if the mold originates from their line, offers product details and potentially downloadable instructions. Search for the mold’s specific product code on their site.
Other mold manufacturers specializing in character designs may host detailed guides or FAQs. Look for sections dedicated to silicone mold care and usage. These sites often feature contact information for direct support regarding their products and any associated documentation.
Safety Precautions
Handling hot chocolate requires extreme caution! Always use oven mitts or pot holders when dealing with melted chocolate to prevent burns. Ensure adequate ventilation while melting, as fumes can be irritating.
Regarding mold material safety, food-grade silicone is generally safe, but verify the mold’s labeling. Avoid using damaged molds, as they may harbor bacteria. Supervise children closely during all stages of chocolate making, especially when hot liquids are involved. Prioritize a safe and enjoyable experience!
Handling Hot Chocolate
Melted chocolate presents burn risks; prioritize safety! Always use heat-resistant gloves or pot holders when handling hot chocolate or molds fresh from warming. Avoid direct contact with skin. Work in a well-ventilated area to minimize fume inhalation.
Be extremely careful when pouring melted chocolate into the Lightning McQueen molds. Spills happen! Keep a damp cloth nearby for quick cleanup. Never add water to melted chocolate, as this causes seizing. Slow and steady pouring prevents accidents.
Mold Material Safety
Most Lightning McQueen chocolate molds are food-grade silicone, generally considered safe. However, always verify the mold’s material before use, especially if purchased from unfamiliar sources. Ensure the silicone is BPA-free and specifically labeled for food contact.
Avoid using damaged molds with cracks or tears, as these can harbor bacteria. Never expose silicone molds to extreme heat sources like open flames. Proper cleaning and storage maintain mold integrity and prevent contamination, ensuring safe chocolate creations.
Advanced Techniques
For truly impressive results, explore layered chocolate colors to mimic McQueen’s vibrant paint job. Carefully pour contrasting shades into the mold, allowing partial setting before adding subsequent layers. Creating 3D effects involves building up chocolate pieces, using melted chocolate as “glue”.
Experiment with airbrushing cocoa butter for detailed shading and highlights. Mastering these techniques elevates your McQueen chocolates from simple treats to miniature works of art, showcasing exceptional skill and creativity.
Layering Chocolate Colors
Achieving McQueen’s signature red requires strategic layering. Begin with a base coat of red chocolate, allowing it to partially set before adding darker red or orange highlights. This prevents colors from muddying. For the eyes, layer white and black for realistic detail;
Controlled temperature is crucial; slightly cooled chocolate adheres better. Practice pouring techniques to avoid blending, creating defined color separations for a visually striking, authentic McQueen finish.
Creating 3D Effects
Enhance your McQueen chocolates with depth! Partially fill molds, letting the first layer set before adding a contrasting color. This builds dimension, particularly effective for the eyes’ highlights and the mouth’s inner details.
Consider using multiple molds to create separate features, attaching them with melted chocolate “glue.” Experiment with angled pours and varying chocolate thicknesses to simulate realistic curves and contours, bringing McQueen to life!
Related Products
Expand your Cars-themed baking! Explore other Disney Cars chocolate molds featuring Mater, Sally, and the entire Radiator Springs crew. Hot Wheels Fusion Factory molds offer options for car-shaped treats, complementing the McQueen features.
Consider fondant molds for creating detailed character bodies or accessories. Tire-shaped molds add realistic touches to cakes. Don’t forget decorating tools like edible markers and luster dust for a professional finish!
Other Disney Cars Molds
Complete your Cars collection! Beyond Lightning McQueen, molds exist for beloved characters like Mater, capturing his tow-truck charm in chocolate. Sally Carrera molds allow for elegant, Porsche-inspired creations. Explore molds featuring Doc Hudson, Fillmore, and even the King for a full Radiator Springs cast.
These molds often come in silicone, ensuring easy release and detailed impressions. Consider themed sets for birthday parties or Cars-enthusiast gifts, expanding your chocolate artistry!
Hot Wheels Fusion Factory Molds
Expand beyond Cars with Hot Wheels Fusion Factory! These molds offer a unique twist, letting you create custom car bodies from melted plastic – a fantastic alternative to chocolate for durable creations. While not directly Cars-themed, the system’s versatility allows replicating McQueen’s style.
Off-road packs and various body styles inspire imaginative designs. Combine Fusion Factory parts with chocolate details for mixed-media art. Explore creating miniature race tracks to showcase your custom vehicles!
Creating Lightning McQueen chocolate features is a rewarding experience! From simple molds to advanced coloring techniques, the possibilities are endless for delightful treats. Mastering tempering and demolding ensures professional-looking results, perfect for themed cakes and parties.
Remember safety precautions when handling hot chocolate. Explore online resources and manufacturer websites for further guidance. With practice, you’ll be crafting impressive McQueen designs in no time, bringing the magic of Radiator Springs to life!
Final Thoughts on McQueen Chocolate Creations
These chocolate molds unlock a world of creative confectionery possibilities! Whether decorating a full Cars-themed cake or crafting individual favors, McQueen’s eyes and mouth add instant recognition. Don’t be afraid to experiment with layering colors and 3D effects for truly dynamic designs.
Ultimately, the joy lies in bringing this beloved character to life through delicious chocolate artistry. Share your creations and inspire others – Ka-chow!
Where to Buy the Mold
Finding the Lightning McQueen chocolate mold is readily achievable through several online retailers. Major platforms like Amazon and eBay frequently stock these molds, offering varied pricing and shipping options. Additionally, specialized cake decorating supply stores, both online and brick-and-mortar, are excellent sources.
Check manufacturer websites for direct purchases and potential bundle deals. Hot Wheels Fusion Factory molds may also be available through their official channels.