
Discover a captivating ambiance with this versatile projector, blending nebula, stars, and multimedia playback for immersive experiences. This manual guides you through effortless setup and operation.
What is a 3-in-1 Projector?
This innovative projector consolidates three distinct visual experiences into a single device. It seamlessly integrates a nebula projector, a star projector, and a multimedia player – offering dynamic and customizable lighting effects. Unlike traditional projectors, this 3-in-1 model isn’t limited to displaying content from external sources.
It creates breathtaking atmospheric displays, simulating a starry night sky or vibrant nebulas. Furthermore, it functions as a mini projector, capable of displaying videos and images via USB connectivity. The inclusion of an AV cable connection expands input options. This all-in-one design provides unparalleled versatility, making it ideal for home entertainment, relaxation, or creating a unique ambiance.
Key Features and Benefits
Experience stunning visual effects with the projector’s nebula and star projection capabilities, creating a relaxing and immersive atmosphere. Enjoy a long-lasting light source, boasting an impressive LED lamp life of up to 50,000 hours, ensuring years of reliable use. The manual focus adjustment allows for a clear viewing picture ranging from 20 to 100 inches.
Benefit from versatile connectivity options, including USB and AV cable inputs, for seamless multimedia playback. The onboard controls and included remote offer convenient operation. Adjust picture modes, color temperature, aspect ratio, and more via the OSD menu. This projector delivers beautiful colors and a captivating experience for all ages.
Package Contents
Upon opening the package, please verify the inclusion of the following items to ensure a complete setup. You should find one 3-in-1 LED Starry Sky Projector Light unit itself, ready for immediate use. A comprehensive User Manual is included, detailing setup, operation, and troubleshooting steps.
Additionally, the package contains a Remote Control for convenient operation from a distance. A 3-in-1 cable is provided, facilitating video connections via the AV slot. An Adaptor Port is also included for enhanced connectivity options. Carefully inspect all components for any signs of damage during shipping. Contact customer support if anything is missing or damaged.

Safety Precautions
Prioritize safety by following guidelines regarding power, cleaning, and general use. Avoid direct eye exposure to the light source for optimal viewing and longevity.
General Safety Guidelines
Ensure a safe and enjoyable experience with your 3-in-1 projector. Always operate the device on a stable, level surface, away from flammable materials. Never disassemble or attempt to repair the projector yourself; contact qualified personnel for assistance. Avoid blocking the ventilation openings to prevent overheating.
Keep the projector away from water and excessive moisture. Do not use the device in extremely humid environments. Supervise children when the projector is in use. Prolonged exposure to bright light may cause eye strain; take frequent breaks. Disconnect the power cord during extended periods of non-use and during thunderstorms. This projector is intended for indoor use only.
Power Supply and Cord Safety
Utilize only the provided power adapter with your 3-in-1 projector. Using an incompatible adapter may damage the device and void the warranty. Ensure the power outlet is easily accessible and meets the voltage requirements specified on the projector’s label. Inspect the power cord regularly for any signs of damage, such as fraying or exposed wires.
Avoid overloading the power outlet with multiple devices. Do not bend or twist the power cord excessively. Never pull the cord to disconnect the projector from the outlet; grasp the plug instead. If the power cord is damaged, it must be replaced by a qualified technician. Keep the power cord away from heat sources and sharp objects.
Cleaning and Maintenance Safety
Before cleaning, always disconnect the projector from the power source. Use a soft, dry cloth to gently wipe the exterior surfaces. Avoid using liquid cleaners, abrasive materials, or strong chemicals, as these can damage the projector’s finish. Regularly dust the ventilation openings to prevent overheating.
Do not attempt to disassemble the projector for cleaning or maintenance. This could expose you to electrical shock and void the warranty. The lens should be cleaned with a specialized lens cleaning cloth to avoid scratches. Store the projector in a cool, dry place when not in use, protected from dust and moisture.

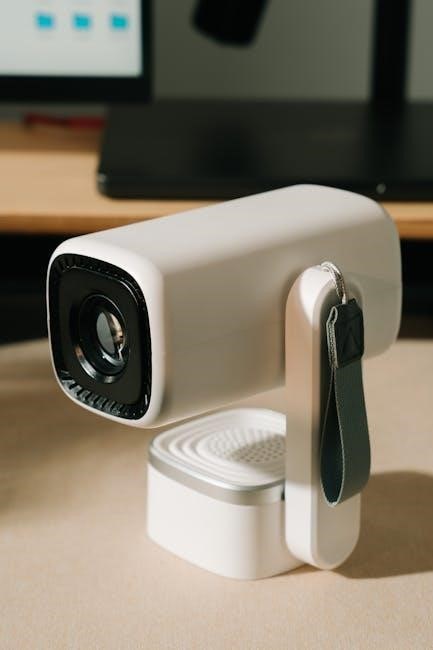
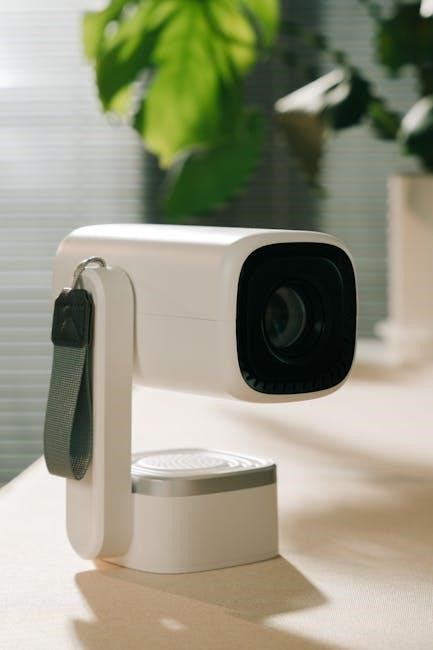
Understanding the Projector Components
Explore the projector’s front and rear panels, including ports for USB, AV cables, and the headphone jack, alongside remote control functionalities.
Front Panel Overview
The front panel houses the projector lens, responsible for displaying the stunning visuals. Adjacent to the lens, you’ll find manual focus adjustment controls, allowing for a crisp and clear image ranging from 20 to 100 inches.
Essential buttons are conveniently located for quick access. These include the power button for turning the projector on and off, and the ‘Source’ button to cycle through available input options like USB and AV.
Additionally, volume controls – ‘Volume Up’ – are present, offering firm adjustments. An infrared port is also integrated for remote control functionality, ensuring seamless operation from a distance. These features combine for user-friendly control.
Rear Panel Connections
The rear panel provides various connection options for diverse media sources. A USB port enables direct playback of videos, photos, and audio files from USB drives. For traditional media players, an AV cable port is available; utilize a 3-in-1 cable to connect the projector’s AV slot for video input.
Furthermore, a headphone jack adaptor port allows for private listening using headphones. This is ideal for late-night viewing without disturbing others. The power input is also located on the rear panel, accepting the provided power adapter.
Carefully connect cables ensuring a secure fit for optimal signal transmission. Refer to the accompanying diagrams for correct connection methods.
Remote Control Functions
The remote control offers convenient operation from a distance. Utilize the “Source” button to cycle through available input sources – USB and AV. Volume control buttons (Volume Up: firm press) adjust the audio level. Arrow and Select (OK) buttons navigate the onscreen display (OSD) menu.
Within the OSD, you can adjust picture mode, color temperature, aspect ratio, noise reduction, flip, reduce, and display size. Other options include OSD language selection, restoring factory settings, blending modes, OSD duration, and software updates via USB.
Ensure the remote is aimed directly at the projector’s infrared receiver for reliable operation; Replace batteries when the remote’s responsiveness diminishes.

Setting Up Your Projector
Begin by connecting the power source and powering on the device. Position the projector for optimal viewing, adjusting focus for a clear image between 20-100 inches.
Powering On and Off
To power on your 3-in-1 LED Starry Sky Projector Light, locate the power button on the projector itself or utilize the remote control. A simple press will initiate the startup sequence, and the LED indicator will illuminate. Ensure a stable power connection for uninterrupted operation.
For powering off, repeat the process – press the power button on the projector or remote. The LED indicator will extinguish, confirming the device is off. Avoid abruptly disconnecting the power cord while the projector is running, as this could potentially affect the internal components. Always use the designated power button for safe shutdown.
Connecting Power Source
Before operation, ensure the projector is compatible with your local power supply (typically 100-240V AC, 50/60Hz). Locate the DC power input jack on the rear panel of the projector. Connect the provided power adapter securely to this jack.
Plug the adapter into a standard wall outlet. Verify the connection is firm to prevent interruptions during use. Do not use a different power adapter than the one supplied, as this could damage the projector. A stable power source is crucial for optimal performance and longevity.
Caution: Always disconnect the power adapter from the wall outlet during extended periods of non-use or before cleaning the projector. Avoid using damaged power cords or outlets.
Initial Setup and Positioning
Place the projector on a stable, level surface – a table or floor – ensuring adequate ventilation around all sides. The ideal projection distance is between 20 to 100 inches for a clear, focused image. Use the manual focus adjustment to achieve optimal sharpness.
Adjust the projector’s angle to direct the image towards your desired projection surface – a wall or screen. Experiment with positioning to minimize distortion and maximize image size. Ensure the projection area is relatively dark for the best visual impact, especially when displaying starry sky effects.
Consider ambient light; darker rooms enhance the nebula and star projections. Fine-tune the position until the image is crisp and fills the desired space.
Using the Onscreen Display (OSD) Menu
Access detailed settings via the OSD menu, adjusting picture mode, color temperature, aspect ratio, noise reduction, flip, reduce, and display size for a customized experience.
Accessing the OSD Menu
To enter the Onscreen Display (OSD) menu, locate and press the “Source” button on either the projector itself or the included remote control. Repeatedly pressing this button may cycle through available input sources before revealing the OSD. Once the menu appears, utilize the arrow buttons – Up, Down, Left, and Right – on the remote to navigate through the various options.
Confirm your selections by pressing the “OK” button, often labeled with arrows pointing in multiple directions. To exit the OSD menu at any time without saving changes, press the “Source” button again, or simply allow the menu to time out after a period of inactivity. The OSD language can also be adjusted within the menu settings, offering user customization.
Picture Mode Adjustments
Within the OSD menu, the “Picture Mode” setting allows you to optimize the visual output for different viewing conditions. Available adjustments typically include options like “Standard,” “Vivid,” “Soft,” or “User.” Selecting “Standard” provides a balanced image suitable for general use. “Vivid” enhances colors for a more dynamic picture, while “Soft” reduces brightness for comfortable viewing in dark rooms.
The “User” mode unlocks manual control over brightness, contrast, saturation, and sharpness. Experiment with these settings to fine-tune the image to your personal preference and the specific content being displayed. Remember to save any changes made in “User” mode to retain your customized settings.
Color Temperature Settings
Adjusting the color temperature impacts the overall warmth or coolness of the projected image. Within the OSD menu, you’ll find options like “Cool,” “Normal,” and “Warm.” “Cool” settings produce a bluer, more vibrant image, ideal for bright environments or content requiring accurate color representation.
“Normal” provides a balanced color temperature suitable for most viewing scenarios. Selecting “Warm” results in a yellower, softer image, reducing eye strain during nighttime viewing. Experiment with each setting to determine which best suits your preferences and the ambient lighting conditions. Fine-tuning the color temperature enhances viewing comfort and visual fidelity.
Aspect Ratio and Noise Reduction
The aspect ratio setting controls how the image is displayed, preventing distortion or black bars. Options typically include 16:9 (widescreen), 4:3 (standard), and Auto. “Auto” intelligently adjusts to the input source. Noise reduction minimizes visual artifacts, particularly noticeable in low-light scenes or with lower-quality input.
Adjusting noise reduction can improve image clarity, but excessive levels may soften details. Experiment with different noise reduction levels – Low, Medium, and High – to find the optimal balance between clarity and detail preservation. Proper aspect ratio selection ensures a correctly proportioned image, enhancing the viewing experience.
Flip, Reduce, and Display Size Options
These features offer flexible image adjustments for various setups. The “Flip” function allows you to invert the image horizontally or vertically, crucial when mounting the projector upside down or for mirroring to an external screen. “Reduce” shrinks the image size, useful if the projection is too large for the available space or screen.
Display size controls the overall projection scale, ranging from 20 to 100 inches, allowing customization based on room size and viewing distance. Manual focus adjustment ensures a sharp, clear picture at your desired size. Utilize these options to optimize the image for your specific environment and preferences.
Input Source Selection
Effortlessly switch between USB, AV cable, and the projector’s internal media player using the source button for diverse content playback options.
Using the Source Button
The Source button, conveniently located on both the projector and the remote control, allows you to cycle through available input sources. Pressing this button will bring up the source menu on your screen, displaying options like USB, AV, and potentially internal media playback.
Use the arrow buttons on the remote (or the projector’s control panel) to highlight your desired input source, then press ‘OK’ or ‘Select’ to confirm your choice. For USB input, ensure your USB drive is formatted correctly (typically FAT32) and contains compatible media files. When connecting via AV cable, remember to properly connect the cables to both the projector and your source device, then select the ‘Video’ source option.
Connecting via USB
To utilize the USB functionality, simply plug your USB storage device into the designated USB port on the projector. Ensure the USB drive is formatted with a compatible file system, generally FAT32, for optimal readability. The projector supports various media formats, allowing you to display photos, videos, and play audio files directly.
Once connected, select ‘USB’ as the input source using the Source button. A file browser will appear, enabling you to navigate through the folders on your USB drive. Choose the desired file and press ‘Display’ or ‘Play’ to begin playback. Note that some projectors may have limitations on the maximum USB drive capacity supported.
Connecting via AV Cable
For connecting external devices using an AV cable, locate the AV input slot on the projector. Utilize a 3-in-1 cable (video convert cable) to connect the projector to your device, mirroring the connection diagram provided in the manual. Ensure a secure connection at both ends.
After physically connecting the cable, navigate to the Source menu on the projector – either via the projector’s Source button or the remote control. Select ‘Video’ as the input source. The projector will then display the video signal from the connected device. Adjust the picture settings as needed for optimal viewing. Proper cable connection and source selection are crucial for a clear image;

Troubleshooting Common Issues
Resolve typical problems like no power, image, or distortion with simple checks: power connections, source selection, and focus adjustments for optimal performance.
No Power
If the projector fails to power on, begin by verifying the power cord is securely connected to both the projector and a functioning wall outlet. Confirm the outlet is delivering power by testing it with another device; Inspect the power cord for any visible damage, such as cuts or fraying; a damaged cord should be replaced immediately.
Next, check the projector’s power button to ensure it’s fully engaged. Some models have a separate power switch on the rear panel – confirm this is also in the ‘on’ position. If using a power strip or surge protector, ensure it is switched on and functioning correctly. A blown fuse within the projector (if applicable) could also be the cause; consult the technical specifications section for fuse replacement instructions.
Finally, if none of these steps resolve the issue, contact customer support for further assistance.
No Image Displayed
If the projector powers on but displays no image, first verify the correct input source is selected using the ‘Source’ button on the projector or remote control. Cycle through available inputs (USB, AV) to ensure the active source matches your connected device. Confirm the connected device (USB drive, DVD player) is powered on and functioning correctly, outputting a compatible signal.
Check the cable connections – ensure they are securely plugged into both the projector and the source device. Try a different cable to rule out a faulty connection. Utilize the manual focus adjustment to sharpen the image; a blurry image can appear as no image. Confirm the ‘Display’ or ‘Stop’ function isn’t activated when using a USB drive.
If the problem persists, consult the troubleshooting section for further guidance.
Distorted Image
A distorted image can stem from several factors. Begin by utilizing the manual focus adjustment to achieve optimal clarity; improper focus is a common cause. Explore the ‘Aspect Ratio’ settings within the OSD menu, experimenting with different ratios to correct stretching or compression. Activate ‘Noise Reduction’ within the OSD to minimize visual artifacts and improve image quality.
If connecting via AV cable, ensure the cable is securely connected and undamaged. Try a different AV cable to rule out a faulty connection. The ‘Flip’ function in the OSD menu allows you to rotate the image if it appears upside down or sideways. Adjust the ‘Display Size’ to fit the projection screen appropriately.
Finally, verify the source material isn’t inherently distorted.

Technical Specifications
This projector boasts a 50,000-hour LED lamp life, displaying vibrant colors. Manual focus allows viewing from 20 to 100 inches, with a standard resolution.
LED Lamp Life
The integrated LED light source within your 3-in-1 projector is engineered for exceptional longevity, providing years of reliable performance. Expect an impressive operational lifespan of up to 50,000 hours. This extended lamp life significantly reduces the need for frequent replacements, minimizing both cost and inconvenience.
Unlike traditional projector lamps that gradually dim over time, the LED maintains consistent brightness throughout its lifespan, ensuring a consistently vivid and immersive viewing experience. While actual lamp life may vary based on usage conditions and settings – such as brightness levels and cooling – you can confidently enjoy countless hours of stunning projections. Proper ventilation and avoiding extreme temperatures will further contribute to maximizing the LED’s lifespan.
Projection Distance and Size
Achieve the optimal viewing experience by adjusting the projection distance. This projector offers a versatile projection size, ranging from 20 to 100 inches diagonally. Shorter distances yield smaller images, ideal for intimate settings, while increasing the distance expands the projected display for larger rooms or group viewing.
Manual focus adjustment allows for precise image clarity at any projection size. Experiment with different distances to find the sweet spot that best suits your space and preferences. Remember that image sharpness is directly related to both distance and focus. A well-adjusted setup will deliver a crisp, detailed, and immersive visual experience, maximizing the enjoyment of your starry sky and multimedia content.
Resolution and Brightness
This projector utilizes a white LED light source, delivering beautiful and vibrant colors for a captivating visual experience. While specific resolution details aren’t provided, the projector is designed to display clear and detailed images within its optimal projection range. Brightness levels are optimized for creating immersive nebula and starry sky effects, particularly effective in darkened rooms.
For best results, minimize ambient light to enhance the contrast and vibrancy of the projected image. The LED lamp boasts an impressive lifespan of up to 50,000 hours, ensuring long-lasting performance and enjoyment. Enjoy countless hours of stunning visuals without the frequent need for lamp replacements, making this projector a reliable and cost-effective entertainment solution.