Pitco Fryer Manual: A Comprehensive Guide
Pitco fryers, including Solstice, ROV, and TorQ series, demand a detailed manual for safe and efficient operation; this guide covers essential aspects.
Pitco fryers represent a cornerstone in commercial kitchens, renowned for their durability, efficiency, and consistent frying results. From high-volume restaurants to smaller food service operations, Pitco offers a diverse range of models – gas, electric, and reduced oil volume (ROV) – catering to varied needs. Understanding the specific features of your Pitco fryer, whether it’s a Solstice Supreme, Solstice, or a computerized SSH55C-2FD model, is crucial for optimal performance.
This manual serves as a comprehensive resource, guiding users through installation, operation, maintenance, and troubleshooting. Proper utilization ensures food safety, extends the fryer’s lifespan, and maximizes return on investment. Familiarizing yourself with the control panel and component locations, like the vat and burner systems, is also essential.
Understanding Pitco Fryer Models
Pitco’s fryer lineup is extensive, encompassing various technologies and capacities; Gas Fryers, like the SG14-S, offer rapid heat-up and recovery, ideal for high-volume frying. ROV Fryers minimize oil usage, reducing costs and environmental impact. Solstice Supreme models prioritize efficiency, while standard Solstice fryers provide reliable performance. Electric options, such as the SE14C and SE14TC, suit locations without gas connections.
Advanced models, like the SSH55C-2FD computer control gas fryer and SFSE14TC fryer battery systems, feature programmable settings and automated functions. Floor models with varying vat sizes (e.g., 50lb) cater to different production levels. Selecting the right model depends on your specific needs and volume.
Safety Precautions for Pitco Fryers
Pitco fryers operate at high temperatures, demanding strict safety adherence. Always ensure proper gas connections and electrical grounding to prevent hazards. Never leave a fryer unattended during operation. Wear appropriate protective gear, including oven mitts and aprons, to avoid burns. Maintain a clear and well-ventilated workspace, free from flammable materials.
Regularly inspect the fryer for any damage or malfunctions. Do not attempt repairs yourself; contact a qualified technician. Exercise extreme caution when handling hot oil. Implement a fire suppression system and ensure staff are trained in its use. Always follow manufacturer’s instructions for safe operation.

Installation and Setup
Proper Pitco fryer installation requires adherence to local codes, including correct gas and electrical connections, ensuring safe and optimal performance from the start.
Gas Connection Requirements
Pitco gas fryers necessitate a properly sized and installed gas supply line, adhering strictly to local plumbing codes and manufacturer specifications. A qualified gas technician must perform the connection. Verify the fryer’s gas type (natural gas or propane) matches the available supply.
Use only black iron pipe or approved flexible gas connectors. A manual shut-off valve should be installed upstream of the fryer for easy access during maintenance or emergencies. Proper pipe sizing prevents insufficient gas flow, impacting fryer performance. Always leak-test all connections with a soap solution after installation, before operating the fryer. Ensure adequate ventilation to prevent gas accumulation.
Electrical Connection Requirements
Pitco electric fryers require a dedicated electrical circuit, matching the fryer’s voltage, amperage, and phase specifications – detailed on the fryer’s data plate. A licensed electrician must perform the electrical connection, ensuring compliance with all local electrical codes.
Use appropriately sized wiring and a dedicated circuit breaker to prevent overloading. Grounding is crucial for safety; ensure a proper ground connection is established. Avoid using extension cords. Regularly inspect wiring for damage. Before any electrical work, disconnect power at the main breaker. Improper electrical connections can cause malfunctions, fire hazards, or void the warranty.
Initial Seasoning of the Fryer
Before first use, thoroughly clean the fryer vat and basket with warm, soapy water, then rinse and dry completely. Add oil to the vat, filling it to the minimum fill line. Heat the oil to its normal frying temperature (typically 350°F/177°C). This initial heating “seasons” the vat, protecting it from rust and enhancing flavor.
Allow the oil to heat for at least one hour. Discard the seasoned oil and repeat the process with fresh oil. This ensures a clean, neutral flavor for your fried foods. Proper seasoning extends the life of your fryer and contributes to optimal performance.
Operating Instructions
Pitco fryers require precise temperature control and careful food loading for optimal results; always follow safety guidelines and monitor oil conditions closely.
Powering On and Temperature Control
Pitco fryers utilize intuitive control panels for precise operation. Begin by verifying the gas or electrical connection, ensuring proper voltage and gas supply pressure. To power on, locate the main power switch – typically found on the control panel – and activate it.
Temperature control is crucial for food quality and safety. Use the designated temperature adjustment knobs or digital interface to set the desired frying temperature. Allow sufficient preheating time, monitoring the oil temperature gauge until it stabilizes.
Modern Pitco models, like the SSH55C-2FD with computer controls, offer programmable settings and precise temperature maintenance. Regularly calibrate the thermostat for accuracy, and never exceed the maximum recommended oil temperature.
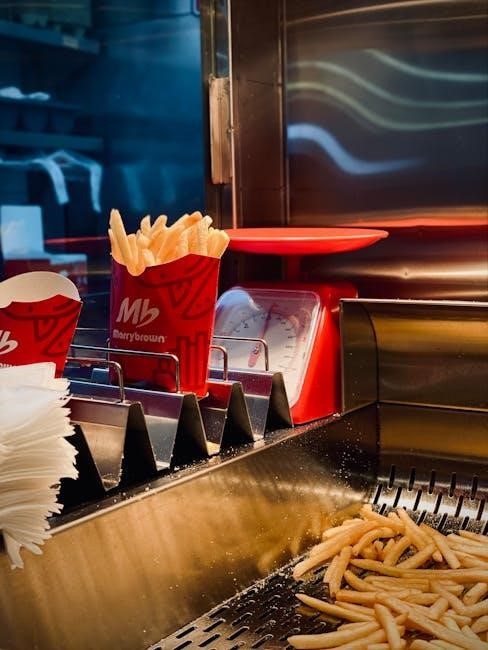
Loading and Frying Food
Prior to loading, ensure the oil has reached the desired frying temperature and is stable. Carefully lower the basket into the hot oil, avoiding splashing. Do not overload the basket; maintain sufficient space for proper circulation and even cooking. Overloading reduces oil temperature and results in soggy food.
Use the timer function, if available, to accurately track frying time. Gently agitate the basket periodically to ensure uniform cooking. Once the timer signals completion, carefully lift the basket and allow excess oil to drain before transferring the fried food.
Always use appropriate frying tools and follow recommended cooking times for different food types to guarantee optimal results and safety.
Monitoring Oil Temperature
Consistent oil temperature is crucial for quality frying. Regularly check the thermometer; Pitco fryers feature precise temperature controls. Fluctuations impact food texture and cooking time. Observe the control panel display for accurate readings and adjust settings as needed to maintain the setpoint.
Recovery time – how quickly the oil returns to temperature after adding food – is a key indicator of oil volume and burner efficiency. Slow recovery suggests insufficient oil or a burner issue. Monitor for excessive temperature spikes, which can indicate overfilled baskets or improper loading.
Consistent monitoring ensures optimal frying and extends oil life.

Maintenance and Cleaning
Regular cleaning—daily procedures, filter replacements, and deep cleans—is vital for Pitco fryer longevity, performance, and food safety standards compliance.

Daily Cleaning Procedures
Consistent daily cleaning significantly extends the life of your Pitco fryer and ensures optimal performance. After each use, allow the oil to cool completely before draining it properly. Remove and thoroughly wash the fry basket and any other removable parts with hot, soapy water. Wipe down the exterior surfaces of the fryer with a damp cloth to remove any food splatters or grease buildup.
Pay close attention to the area around the burner and controls, ensuring they are free from debris. Regularly skimming the oil during operation helps remove food particles and prolongs oil life. Proper daily maintenance prevents carbon buildup and maintains consistent frying temperatures, contributing to superior food quality and a safer operating environment.
Filter Replacement Schedule
Maintaining a strict filter replacement schedule is crucial for optimal Pitco fryer performance and oil quality. Filter paper should be replaced after each use, or more frequently with heavy frying volume. For models with automatic filter systems, follow the manufacturer’s recommendations for filter change intervals, typically ranging from 24 to 72 hours of continuous operation.
Inspect filters regularly for tears or excessive buildup. Clogged filters restrict oil flow, leading to temperature fluctuations and reduced frying efficiency. Consider using a high-quality filter aid to extend filter life and improve oil clarity. Proper filtration prevents carbon buildup and ensures consistently delicious fried foods.
Deep Cleaning Instructions
Regular deep cleaning extends the life of your Pitco fryer and maintains food safety. First, disconnect the fryer from power and allow the oil to cool completely. Drain the oil, then carefully remove the vat and basket assembly for thorough cleaning with hot, soapy water. Scrub all surfaces to remove carbon buildup and food residue.
Clean the burner and gas valve systems, ensuring all ports are clear. Wipe down the exterior surfaces with a damp cloth. Reassemble the fryer and perform a seasoning cycle before refilling with fresh oil. Always refer to your specific model’s manual for detailed instructions.

Troubleshooting Common Issues
Addressing problems like heating failures, temperature fluctuations, or gas supply issues is crucial for maintaining optimal Pitco fryer performance and safety.
Fryer Not Heating
If your Pitco fryer isn’t heating, begin by verifying the gas supply is connected and turned on, especially for gas models. Check the pilot light; if extinguished, follow the relighting procedure detailed in your specific model’s manual. For electric fryers, confirm the power switch is on and the circuit breaker hasn’t tripped.
Inspect the high-limit reset button – it may have tripped due to overheating. Allow the fryer to cool, then press the reset button. A faulty burner, gas valve, or heating element (electric models) could also be the cause, requiring professional diagnosis and repair. Always disconnect power or gas before inspecting internal components. Refer to the parts diagram for component locations.
Oil Temperature Fluctuations
Inconsistent oil temperatures in your Pitco fryer often stem from overloading the vat with too much food at once, causing a significant temperature drop. Ensure you’re adhering to the fryer’s maximum load capacity. Check the thermostat calibration; an inaccurate thermostat will lead to temperature swings.
Drafts or improper ventilation can also affect oil temperature. Ensure the fryer is shielded from direct airflow. A failing heating element (electric) or burner (gas) can cause fluctuations. Regularly monitor and maintain proper oil levels, as low levels can impact temperature stability; Consider a professional inspection if issues persist.
Gas Supply Problems
If your Pitco gas fryer isn’t igniting, first verify the main gas supply is turned on and that the pilot light is lit (if applicable). Check the gas valve for obstructions or damage; a faulty valve prevents gas flow. Low gas pressure can also be a culprit – contact your gas provider to investigate.
Ensure the fryer’s gas connection meets local codes and regulations. A blocked burner orifice restricts gas flow, hindering ignition. Inspect the burner for debris or carbon buildup. If problems continue, immediately shut off the gas supply and consult a qualified technician for repairs; never attempt self-repair of gas lines.

Specific Pitco Fryer Series
Pitco offers diverse fryer series like Solstice Supreme, Solstice, and ROV, each with unique features and operational nuances detailed within this manual.
Solstice Supreme Gas Fryers
Solstice Supreme Gas Fryers represent Pitco’s high-efficiency gas frying technology, designed for substantial output and consistent food quality. These models, often floor-standing, feature robust construction and advanced burner systems for rapid oil recovery.
Understanding the specific controls and safety features is crucial. The manual details proper gas connection procedures, emphasizing leak detection and ventilation requirements. Operation involves precise temperature control, monitored via the digital display. Regular maintenance, including filter changes and thorough cleaning, ensures optimal performance and longevity. Pay close attention to the manual’s guidance on troubleshooting common issues like burner malfunctions or temperature inconsistencies. Proper usage extends the fryer’s lifespan and maintains food safety standards.
Solstice Gas Fryers
Solstice Gas Fryers offer a balance of performance and efficiency for commercial kitchens. The Pitco manual emphasizes the importance of correct installation, specifically regarding gas supply connections and proper ventilation to prevent carbon monoxide buildup. Operation requires understanding the thermostat controls for accurate temperature settings, vital for consistent frying results.
Regular maintenance, as outlined in the manual, includes daily cleaning of the vat and filter systems. Scheduled filter replacement is critical for oil quality and food taste. Troubleshooting sections address common issues like burner ignition failures or temperature fluctuations. Always consult the manual before attempting repairs, and prioritize safety by disconnecting the gas supply before any maintenance procedures. Following these guidelines ensures reliable operation and extends the fryer’s service life.
ROV Reduced Oil Volume Fryers
Pitco’s ROV (Reduced Oil Volume) Gas Fryers are designed for efficiency, using significantly less oil than traditional models. The manual stresses the importance of understanding this unique design when performing maintenance and cleaning. Proper oil level monitoring is crucial, as underfilling can damage heating elements, while overfilling negates the oil-saving benefits.
The manual details specific cleaning procedures for the ROV system, focusing on the lower oil volume and potential for quicker sediment buildup. Troubleshooting guides address issues related to the reduced oil capacity, such as faster temperature recovery times. Always refer to the manual for correct burner adjustments and gas pressure settings to optimize performance and ensure safe operation of these specialized fryers.

Parts and Components
Pitco fryers utilize key components like vats, baskets, burner systems, and control panels; the manual provides detailed diagrams and part numbers for easy identification.
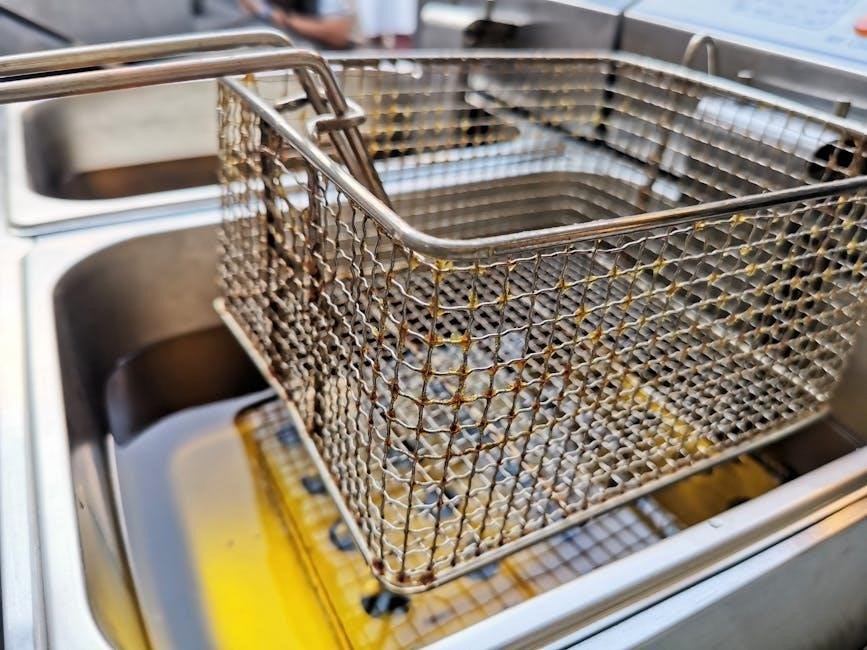
Vat and Basket Assembly
The vat is the central component, typically constructed from stainless steel to withstand high temperatures and frequent use. Pitco fryers offer various vat sizes, commonly 50lb, accommodating different production volumes. Proper vat cleaning is crucial, detailed in the maintenance section.
The basket assembly, also stainless steel, securely holds food during frying. Ensure the basket is correctly positioned within the vat before powering on the fryer. Regularly inspect basket handles and mesh for wear and tear, replacing damaged parts immediately. The manual illustrates proper basket insertion and removal techniques to prevent spills and burns. Understanding the vat and basket’s interaction is vital for safe and efficient frying operations.
Burner and Gas Valve Systems
Pitco gas fryers utilize robust burner and gas valve systems for precise temperature control. These systems convert gas pressure into a controlled flame, heating the frying oil. The gas valve regulates gas flow, responding to thermostat settings. Regular inspection of burner ports is essential; clear any obstructions to ensure even heating.
The manual details proper gas connection requirements, emphasizing the need for qualified technicians. Never attempt to repair gas components yourself. A malfunctioning gas valve can create a hazardous situation. Understanding the interplay between the burner, valve, and thermostat is crucial for safe and efficient operation. Always follow the outlined safety precautions when dealing with gas-powered equipment.
Control Panel Overview
Pitco fryer control panels vary by model, from simple analog dials to sophisticated computer controls like the SSH55C-2FD. Basic panels feature a thermostat for temperature adjustment and power indicators. Advanced systems offer programmable cycles, melt modes, and precise temperature monitoring.
The manual provides detailed diagrams identifying each control’s function. Familiarize yourself with the power switch, temperature settings, and any alarm indicators. Computerized systems often include error codes for troubleshooting. Understanding the control panel is vital for optimal performance and safety. Regularly check for proper functionality and consult the manual for specific model instructions.

Advanced Features
Pitco fryers boast features like computer control systems (SSH55C-2FD), fryer battery systems (SFSE14TC), and automatic filtration for enhanced efficiency and precision.
Computer Control Systems (SSH55C-2FD)
The Pitco SSH55C-2FD computer control system represents a significant advancement in fryer technology, offering precise temperature management and operational efficiency. This system allows for programmable cooking cycles, ensuring consistent product quality and reducing operator error. Users can input specific cooking parameters for various food items, automating the frying process.
Key features include digital display of oil temperature, melt mode for efficient oil management, and a countdown timer for accurate cooking times. The SSH55C-2FD also incorporates a high-limit switch for enhanced safety, preventing overheating. Diagnostic capabilities aid in troubleshooting, minimizing downtime. Regular calibration is recommended to maintain accuracy, and the system’s interface is designed for intuitive operation, even with minimal training.
Fryer Battery Systems (SFSE14TC)
Pitco’s SFSE14TC fryer battery systems are designed for high-volume frying operations, maximizing efficiency and throughput. These systems consist of multiple fryers connected to a centralized filtration system, streamlining the oil management process. A key benefit is reduced oil usage due to shared filtration and consistent oil quality across all fryers.
The SFSE14TC features automatic fill capabilities, maintaining optimal oil levels, and integrated controls for synchronized operation. Regular filter changes are crucial for performance, and the system’s design facilitates easy access for maintenance. Proper ventilation is essential when operating a fryer battery. Operators should familiarize themselves with the system’s safety features and follow recommended cleaning procedures to ensure longevity and optimal performance.
Automatic Filter Systems
Pitco’s automatic filter systems significantly extend oil life and reduce labor costs associated with manual filtration. These systems typically employ a pump and filter media to remove food particles and impurities from the frying oil, maintaining optimal flavor and quality. Regular filter replacement is paramount for effective operation; schedules vary based on usage.
Automatic filtration minimizes downtime, allowing for continuous frying during the process. Proper system setup and maintenance, including cleaning the filter housing and inspecting hoses, are crucial. Some models feature automatic backflushing to clean the filter media. Always consult the specific model’s manual for detailed instructions and safety precautions regarding operation and maintenance of the automatic filter system.

Warranty Information
Pitco fryer warranties cover defects in materials and workmanship; details vary by model. Claim procedures require proof of purchase and adherence to specific guidelines.
Pitco Fryer Warranty Details
Pitco fryers are backed by a limited warranty, the specifics of which depend on the model and date of purchase. Generally, warranties cover manufacturing defects in materials and workmanship under normal commercial use. Parts are typically covered for a specified period, often one to two years, while labor may have a shorter coverage duration.
The warranty does not cover damage resulting from improper installation, misuse, neglect, accidents, unauthorized modifications, or the use of non-genuine Pitco parts. Regular maintenance, as outlined in the manual, is crucial to maintain warranty validity. Warranty claims require proof of purchase, a detailed description of the issue, and often, authorization from Pitco before repairs are undertaken.
Claim Procedures
To initiate a warranty claim for your Pitco fryer, first, contact Pitco’s customer service department with your model number, serial number, and proof of purchase. A detailed description of the defect, including when it occurred, is essential. Pitco may request photos or videos to assess the issue remotely.
If the claim is approved, Pitco will provide a Return Merchandise Authorization (RMA) number and instructions for shipping the defective part or fryer. All shipping costs are the responsibility of the claimant unless specifically covered by the warranty terms. Repairs or replacements will be performed at Pitco’s discretion.