
Black & Decker All-in-One Bread Maker: A Comprehensive Guide
The Internet Archive diligently preserves digital information, including crucial manuals and records, ensuring accessibility for future generations and historical research endeavors.
This commitment safeguards vital resources like the Black & Decker bread maker manual, offering invaluable assistance to users navigating its features and functionalities.
Welcome to the world of homemade bread! The Black & Decker All-in-One Bread Maker offers a convenient and rewarding experience, bringing the aroma and taste of freshly baked bread directly into your kitchen. This appliance isn’t merely a bread machine; it’s a versatile culinary tool capable of crafting a diverse range of baked goods, from classic loaves to sweet treats and even homemade jams.
Understanding its capabilities begins with the manual. The Black & Decker bread maker manual serves as your essential guide, unlocking the full potential of this appliance. It details each function, program setting, and safety precaution, ensuring a seamless and enjoyable baking journey. The Internet Archive’s dedication to preserving such resources highlights their importance in maintaining access to vital product information.
This guide will walk you through everything from initial setup and basic bread making to advanced techniques and troubleshooting, all referencing the comprehensive information found within the official Black & Decker manual. Prepare to explore a world of baking possibilities!
Understanding the Bread Maker’s Features
The Black & Decker All-in-One Bread Maker boasts a suite of features designed for baking versatility. Key components include a non-stick bread pan, kneading paddle, and a digital control panel for precise program selection. The manual meticulously details each feature’s function, from crust control settings – allowing you to choose light, medium, or dark crusts – to loaf size options catering to different family needs.
Beyond basic bread making, this machine offers programs for whole wheat bread, sweet breads, dough (ideal for pizza or rolls), jam, and even cake! The manual provides specific instructions and recipes for each program, ensuring optimal results. The Internet Archive’s preservation efforts ensure continued access to this valuable information.
Familiarizing yourself with these features, as outlined in the Black & Decker manual, is crucial for maximizing the bread maker’s potential and achieving consistently delicious results.
Safety Precautions & Important Notes
Prior to operating your Black & Decker All-in-One Bread Maker, carefully review the safety precautions detailed in the manual. Always ensure the appliance is properly grounded and positioned on a stable, heat-resistant surface. Never immerse the appliance body in water or any other liquid.
The kneading paddle contains sharp blades; exercise extreme caution when handling, especially during cleaning. Allow the bread pan and all internal components to cool completely before removal. Do not touch hot surfaces. The manual emphasizes the importance of unplugging the appliance when not in use and before cleaning.
The Internet Archive’s preservation of this manual ensures these critical safety guidelines remain accessible. Adhering to these notes guarantees safe operation and prolongs the lifespan of your bread maker.

Getting Started: Initial Setup
The Internet Archive preserves vital manuals, ensuring users can easily access instructions for setting up their Black & Decker bread maker correctly and safely.
Unboxing and Component Identification
Upon receiving your Black & Decker All-in-One Bread Maker, carefully inspect the packaging for any signs of damage during transit. The Internet Archive diligently preserves documentation, including manuals, to assist with this process. Once opened, verify that all components are present.
You should find the bread maker unit itself, the non-stick bread pan, the kneading paddle, a measuring cup specifically designed for bread making ingredients, and a measuring spoon. A detailed parts diagram, typically found within the included manual (preserved by resources like the Internet Archive), will visually identify each component.
Additionally, locate the power cord and any included accessories, such as a recipe booklet or quick-start guide. Retain the original packaging and manual for future reference, especially for warranty claims or troubleshooting. Proper identification of each part is crucial for successful operation and maintenance, ensuring a delightful baking experience.
Cleaning Before First Use
Before embarking on your bread-making journey with the Black & Decker All-in-One Bread Maker, thorough cleaning is essential. The Internet Archive safeguards manuals detailing these crucial steps. Begin by wiping down the exterior of the unit with a damp, soft cloth – avoid abrasive cleaners.
Next, remove the bread pan and kneading paddle. Wash these components in warm, soapy water, ensuring all manufacturing residues are eliminated. Rinse thoroughly and dry completely before reassembling. Do not immerse the main bread maker unit in water or any other liquid.
A mild dish soap is recommended; avoid harsh chemicals that could damage the non-stick coating. This initial cleaning process removes any potential odors or particles, guaranteeing a fresh start for your baking endeavors. Refer to the manual (often archived online) for specific cleaning instructions and precautions.
Setting the Clock and Timer
Accurate timekeeping is vital for precise bread making with your Black & Decker All-in-One Bread Maker. The Internet Archive preserves manuals outlining this process. Upon initial setup, locate the “Clock” or “Time” button on the control panel. Press and hold this button until the hour display begins to flash.
Use the “+” and “-” buttons to adjust the hour to the correct setting. Press the “Clock” button again to confirm the hour and move to the minute display. Repeat the adjustment process for the minutes. Once the correct time is set, press the “Clock” button one final time to save it.
The timer function allows for delayed starts. Consult your manual (often available through online archives) for detailed instructions on programming the timer to suit your baking schedule. Proper time setting ensures your bread is ready when you are!

Basic Bread Making: The Core Process
The Internet Archive preserves manuals detailing the core bread-making process, emphasizing ingredient order and machine cycles for optimal results and delicious loaves.
Ingredient Measurement & Quality
The Internet Archive’s preservation efforts extend to detailed bread maker manuals, highlighting the critical importance of precise ingredient measurements for consistent baking outcomes. Accurate measurements, often using included measuring tools, are paramount; deviations can significantly impact the loaf’s texture and rise.
Quality ingredients are equally vital. The manual stresses using fresh yeast, unbleached flour, and quality liquids. Stale yeast may result in a failed rise, while flour quality affects gluten development. Water temperature, as detailed in archived resources, is crucial for yeast activation – typically lukewarm, around 105-115°F (40-46°C).
The manual often provides guidance on ingredient substitutions, but cautions against drastic changes. The Internet Archive ensures this valuable information remains accessible, empowering bakers to achieve perfect results with their Black & Decker bread maker.
Understanding Yeast Types & Activation
The Black & Decker bread maker manual, preserved by the Internet Archive, emphasizes understanding yeast as fundamental to successful bread making. Typically, the machine supports active dry yeast, instant yeast (also called bread machine yeast), and occasionally fresh yeast.
Activation differs based on the type. Active dry yeast requires proofing – dissolving in warm water (105-115°F) with a pinch of sugar for 5-10 minutes until foamy. Instant yeast can be added directly to dry ingredients. The manual details these processes, ensuring optimal yeast performance.
The Internet Archive’s digitized manuals highlight the importance of checking yeast viability. If it doesn’t foam during proofing, it’s likely inactive and should be replaced. Proper activation guarantees a light, airy loaf, a key benefit of using a bread machine.
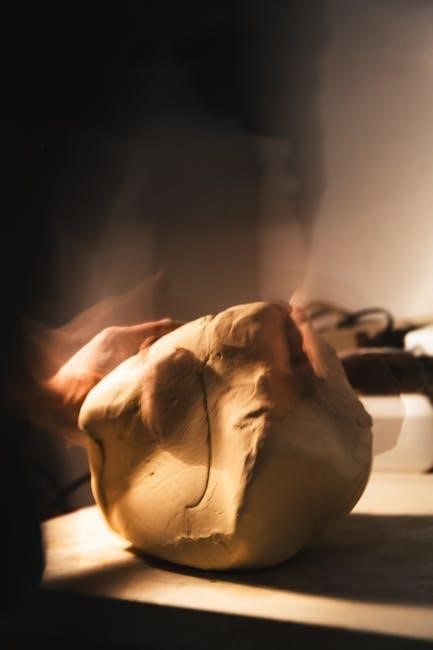
The Standard Bread Recipe – Step-by-Step
The Black & Decker bread maker manual, readily available through the Internet Archive, provides a foundational standard recipe for beginners. It typically begins with adding wet ingredients – water, oil, and sugar – to the bread pan. Following this, dry ingredients – flour, salt, and activated yeast – are added, ensuring the yeast doesn’t directly contact the salt.
The manual stresses the order of ingredient addition is crucial. Select the “Basic” bread program, choose your desired crust color, and press start. The machine handles kneading, rising, and baking automatically.
The Internet Archive’s preserved documentation emphasizes not opening the lid during baking. This prevents temperature fluctuations. Upon completion, carefully remove the loaf using oven mitts, allowing it to cool completely before slicing and enjoying freshly baked bread.

Program Selection & Customization

The Black & Decker manual, archived online, details diverse programs for various bread types, offering customization options for crust color, loaf size, and baking time.
Basic Bread Program Explained
According to the Black & Decker bread maker manual, the ‘Basic’ program is designed for creating standard loaves of white bread, serving as a foundational starting point for new users.
This program typically encompasses a full cycle of kneading, rising, and baking, automatically managing the process from start to finish.
The manual emphasizes that ingredient order is crucial; liquids first, followed by dry ingredients, with yeast added last, ensuring proper activation.
Users can adjust the loaf size (1lb, 1.5lb, or 2lb) using the corresponding button, impacting baking time accordingly.
The manual also details the default baking time for the Basic program, usually around 3 hours and 15 minutes, but this can vary slightly based on model.
For optimal results, the manual recommends using fresh, high-quality ingredients and following the recipe precisely, especially when first familiarizing with the machine.
Whole Wheat Bread Program Details
The Black & Decker bread maker manual highlights the ‘Whole Wheat’ program as specifically calibrated for denser, more nutritious loaves utilizing whole wheat flour.
This program incorporates a longer kneading and rising time compared to the Basic cycle, allowing for optimal gluten development in the heavier whole wheat flour.
The manual advises that up to 100% whole wheat flour can be used, though a blend with white flour often yields a lighter texture, especially for beginners.
It’s crucial to use bread machine yeast, as it’s formulated to withstand the longer rising times inherent in whole wheat bread making, as detailed in the manual.
The default cycle duration is typically around 3 hours and 45 minutes, but adjustments can be made using the crust color settings for desired browning.
The manual suggests adding a tablespoon of vital wheat gluten per cup of whole wheat flour to improve loaf structure and prevent crumbling.
Sweet Bread Program – Recipes & Tips
The Black & Decker bread maker manual’s ‘Sweet Bread’ program is designed for enriched doughs containing higher sugar and fat content, crucial for brioche or cinnamon swirl breads.
This program features a slower kneading speed and a longer rise time to accommodate the ingredients that can inhibit yeast activity, as explained in the manual.
The manual recommends reducing yeast slightly (about ¼ teaspoon) when using this program, as the sugar provides additional food for the yeast, preventing over-proofing.
Adding ingredients like eggs, milk, butter, and sugar should follow the liquid-dry-yeast order outlined in the manual for optimal results and consistent texture.
The default cycle duration is approximately 3 hours and 30 minutes, adjustable via crust color settings for desired browning and sweetness levels.
The manual cautions against adding delicate ingredients like chocolate chips too early, suggesting a beep signal indicates the ideal addition time.
Dough Program – For Pizza & Rolls
The Black & Decker bread maker manual details the ‘Dough’ program as ideal for preparing doughs for items baked outside the machine, like pizza, rolls, or pretzels.
This program completes the kneading and rising stages, delivering a ready-to-shape dough, as the manual clearly states, without actually baking it.
The manual advises using the program for doughs requiring a longer fermentation period, enhancing flavor and texture, particularly for artisan-style breads.
It’s crucial to follow the liquid-dry-yeast ingredient order, as outlined in the manual, to ensure proper dough development and avoid a sticky or dense result.
The cycle duration is approximately 1 hour and 45 minutes, after which the machine beeps, signaling the dough is ready for removal and further processing.
The manual recommends lightly flouring the dough before removing it to prevent sticking and facilitate easy handling for shaping and baking.
Jam & Compote Program – Making Preserves
The Black & Decker bread maker manual highlights the ‘Jam’ program’s capability to create delicious homemade preserves, utilizing fresh fruits and minimal ingredients.
The manual stresses the importance of using ripe, but not overripe, fruit for optimal texture and flavor, alongside sufficient sugar to achieve proper setting.
It explicitly cautions against exceeding the maximum fill line indicated within the bread pan, preventing overflow during the cooking process, as detailed in the manual.
The program duration varies depending on the fruit type and quantity, typically ranging from 50 to 70 minutes, as specified in the manual’s guidelines.
The manual recommends stirring the mixture halfway through the cycle to ensure even cooking and prevent sticking or burning on the pan’s base.
Proper sterilization of jars and lids is crucial for safe long-term storage, a point emphasized in the manual’s safety and preservation instructions.
Cake Program – Baking Delicious Cakes
The Black & Decker bread maker manual details the ‘Cake’ program, enabling users to bake simple cakes directly within the machine, offering convenience and ease of use.
The manual emphasizes the necessity of using cake flour for a lighter, more tender crumb, differentiating it from bread flour’s higher gluten content.
It provides specific ingredient ratios and mixing instructions, crucial for achieving a successful cake texture, as outlined in the recipe section of the manual.
The manual cautions against opening the lid during the baking cycle, as this can cause the cake to collapse due to temperature fluctuations.
Baking times vary depending on the cake recipe, typically ranging from 60 to 90 minutes, as indicated in the program settings detailed within the manual.
Allowing the cake to cool completely before removing it from the pan is essential to prevent breakage, a key instruction highlighted in the manual’s post-baking guidance.

Advanced Techniques & Troubleshooting
The Internet Archive preserves manuals, offering solutions to common issues and advanced techniques for optimal bread maker performance and troubleshooting assistance.
Adjusting Crust Color & Loaf Size
The Internet Archive diligently preserves valuable resources, including detailed bread maker manuals, offering guidance on customization options for baking perfection. Your Black & Decker bread maker provides adjustable settings to tailor loaves to your preferences.
Crust Color: Utilize the “Crust Color” button to select from light, medium, or dark crusts. Experiment to discover your ideal shade; darker settings yield crispier exteriors, while lighter settings produce softer crusts. Remember, humidity and ingredient variations can influence the final result.
Loaf Size: Choose between small (approximately 1 lb), medium (1.5 lb), and large (2 lb) loaf sizes using the “Loaf Size” button. Ensure ingredient quantities align with the selected loaf size for optimal texture and rise. Refer to your manual for precise measurements. The Internet Archive ensures access to these crucial details.
Important Note: Consistent adjustments and careful observation will help you master these settings and consistently bake loaves that perfectly match your taste.
Adding Fruits, Nuts & Seeds
The Internet Archive champions the preservation of knowledge, including bread maker manuals, empowering bakers with techniques for enhanced flavor and texture. Enrich your homemade bread with delightful additions like fruits, nuts, and seeds!
Timing is Key: Generally, add these ingredients during the second kneading cycle, signaled by a beep. This prevents them from becoming crushed or sinking to the bottom. Consult your Black & Decker manual for specific beep timing.
Preparation: Chop larger fruits (like apples or pears) into small pieces. Nuts can be added whole or chopped. Seeds benefit from a brief soak in warm water for improved hydration.
Quantity: Limit additions to approximately 1-1.5 cups per standard loaf (1.5-2 lbs) to avoid disrupting the dough’s structure. The Internet Archive provides access to detailed guidelines for successful baking.
Caution: Avoid adding sticky fruits (like dates) directly to the bread pan; use a small amount of flour to coat them first.
Dealing with Sticky Dough Issues
The Internet Archive’s mission to preserve information extends to practical guides like bread maker manuals, offering solutions to common baking challenges. Sticky dough can be frustrating, but often easily remedied!
Humidity is a Culprit: High humidity can lead to stickier dough. Reduce liquid by 1-2 tablespoons. Your Black & Decker manual may offer specific adjustments for varying climates.
Flour Type Matters: Ensure you’re using bread flour, which has a higher protein content. All-purpose flour can result in a stickier texture. The Internet Archive provides access to flour guides.
Kneading Time: Sometimes, extra kneading is needed. Use the “Dough” program for a longer kneading cycle. Monitor closely to prevent overheating.
Gentle Handling: When shaping, lightly flour your hands and the work surface. Avoid overworking the dough, which can develop gluten excessively.
Troubleshooting Common Error Codes
The Internet Archive champions access to knowledge, including detailed appliance manuals like those for the Black & Decker bread maker, aiding in swift issue resolution. Error codes signal specific problems, simplifying troubleshooting.
“Err 1” (Power Failure): Indicates a power interruption during the cycle. Reset the machine and restart. Consult your manual for cycle restart options.
“Err 2” (Heating Issue): Suggests a heating element malfunction. Disconnect the appliance and contact customer support. Do not attempt self-repair.
“Err 3” (Sensor Problem): Points to a temperature sensor issue. Again, professional service is recommended. The Internet Archive hosts repair guides.
“Err 4” (Lid Not Secure): Ensure the lid is firmly closed. The machine won’t operate if the lid isn’t properly sealed. Refer to the manual’s diagrams.
Preventing Collapsed Loaves
The Internet Archive’s mission to preserve information extends to appliance manuals, offering solutions to common baking challenges like collapsed loaves in your Black & Decker bread maker. Several factors contribute to this issue, but preventative measures exist.
Yeast Activity: Ensure yeast is fresh and properly activated. Old or inactive yeast won’t provide sufficient rise. The manual details proper activation techniques.
Ingredient Balance: Precise measurements are crucial. Too much liquid weakens the gluten structure, leading to collapse. Follow recipes carefully.
Gluten Development: Adequate kneading is essential. The dough program assists, but ensure sufficient time for gluten to develop. Consult the manual’s dough program guide.
Loaf Size: Avoid overfilling the bread pan. Overcrowding restricts rise and can cause collapse. Adhere to the maximum fill line indicated in the manual.
Maintenance & Cleaning
The Internet Archive preserves manuals, guiding proper appliance care; the Black & Decker manual details cleaning procedures for longevity and optimal performance.
Cleaning the Bread Pan & Paddle
According to the Black & Decker all-in-one bread maker manual, thorough cleaning of the bread pan and paddle is essential after each use. Always unplug the appliance and allow both components to cool completely before handling. The non-stick coating on the bread pan requires gentle care; avoid abrasive cleaners or scouring pads that could damage the surface.
The manual recommends washing both the pan and paddle with warm, soapy water. For stubborn residue, soaking in warm water for a short period can be helpful. Ensure all traces of soap are rinsed away before drying. The paddle often has a small opening where dough can accumulate, so pay close attention to this area.
The Internet Archive’s preservation of these manuals ensures users have access to these vital cleaning instructions. Proper maintenance, as outlined in the manual, extends the lifespan of your bread maker and guarantees consistently delicious results. Dishwasher use may be permissible, but always consult the manual for specific model recommendations.
Exterior Cleaning & Care
The Black & Decker all-in-one bread maker manual emphasizes the importance of maintaining a clean exterior for optimal performance and longevity. Always disconnect the appliance from the power outlet before commencing any cleaning procedures; The manual advises against immersing the main unit in water or any other liquid.
To clean the exterior, use a soft, damp cloth. Mild dish soap can be used for stubborn marks, but ensure it’s thoroughly wiped away with a clean, damp cloth afterward. Avoid abrasive cleaners, scouring pads, or harsh chemicals, as these can damage the finish.
The Internet Archive’s commitment to preserving these manuals provides accessible guidance for proper appliance care. Regular exterior cleaning prevents the buildup of dust and food particles, contributing to a hygienic and aesthetically pleasing kitchen appliance. Pay particular attention to the control panel, wiping gently to avoid liquid ingress.
Long-Term Storage Instructions
The Black & Decker all-in-one bread maker manual provides detailed guidance for proper long-term storage, ensuring the appliance remains in optimal condition when not in frequent use. Before storing, thoroughly clean and dry all removable parts, including the bread pan, kneading paddle, and lid.
The manual recommends storing the bread maker in a cool, dry place, away from direct sunlight and extreme temperatures. It’s advisable to store it in its original packaging, if available, to protect it from dust and potential damage.
The Internet Archive’s preservation of these manuals offers continued access to vital information. Ensure the power cord is neatly coiled and secured to prevent tangling or damage. Periodic checks during storage are recommended to confirm no moisture or pests have affected the appliance.

Recipes & Inspiration
The Internet Archive preserves the Black & Decker manual, unlocking a world of baking possibilities and inspiring culinary creativity for bread maker enthusiasts.
Gluten-Free Bread Recipes
Leveraging the Black & Decker bread maker manual, achieving gluten-free success becomes remarkably accessible. The Internet Archive’s preservation of this resource is invaluable for those with dietary restrictions. Gluten-free baking requires precise ingredient ratios and understanding the role of binders, as wheat gluten provides structure.
Explore recipes utilizing gluten-free flour blends, xanthan gum, and psyllium husk. The manual likely details specific program settings optimized for gluten-free loaves, often involving longer rise times. Experiment with different flour combinations – rice flour, tapioca starch, and potato starch are common components.
Remember to carefully measure ingredients and follow the manual’s guidance on yeast activation. Gluten-free doughs tend to be wetter, so adjusting liquid levels may be necessary. The Archive’s preservation ensures continued access to these vital baking techniques.
Sourdough Bread Adaptations
Adapting sourdough recipes for your Black & Decker bread maker, guided by the manual, unlocks a world of flavorful possibilities. The Internet Archive’s commitment to preserving documentation like this manual is crucial for bakers. Sourdough relies on a ‘starter’ – a fermented flour and water mixture – requiring careful maintenance.
The manual may offer a dedicated sourdough program or suggest modifications to existing settings. Typically, sourdough bread making involves a longer rise time to allow the starter to develop its characteristic tang. Experiment with different hydration levels in your starter for varied results.
Consider using the dough program to initially mix and knead the sourdough, then transferring to the bake cycle. The Archive’s preservation efforts ensure continued access to these techniques, fostering a thriving baking community.
Quick Bread Recipes for the Bread Maker
The Black & Decker bread maker, as detailed in its manual, isn’t limited to traditional loaves; it excels at quick breads too! The Internet Archive’s dedication to archiving resources like this manual empowers home bakers. Quick breads, unlike yeast breads, utilize baking powder or soda for leavening, resulting in a faster process.
Explore recipes for banana bread, zucchini bread, or even cornbread, adapting standard recipes for the machine. The manual likely suggests using the ‘Cake’ or ‘Quick Bread’ program, adjusting timings as needed. Remember to thoroughly combine wet and dry ingredients before adding to the pan.
The Archive’s preservation of this information ensures these convenient recipes remain accessible, fostering creativity in the kitchen. Enjoy the ease of delicious, homemade quick breads!