Farmhouse Table Plans PDF: A Comprehensive Guide
Unlock rustic elegance! This guide compiles 7 free DIY farmhouse table plans in PDF format, perfect for adding charm to any home, offering diverse styles․
Farmhouse table design embodies rustic simplicity, warmth, and a welcoming aesthetic․ Originating from practical, family-focused farm life, these tables prioritize durability and communal gathering; Today’s farmhouse style blends this heritage with modern sensibilities, often featuring distressed finishes and solid wood construction․
Numerous free plans, readily available in PDF format, empower DIY enthusiasts to recreate this timeless look․ These plans cater to varying skill levels, from basic rectangular designs to more intricate X-leg or pedestal base constructions․ The enduring appeal lies in the table’s ability to become a central hub for meals, projects, and cherished memories․
Why Choose a DIY Farmhouse Table?
Embrace affordability and personalization! Building your own farmhouse table, guided by readily available PDF plans, offers significant cost savings compared to purchasing a pre-made option․ Beyond budget benefits, DIY allows complete customization – size, finish, and design elements can be tailored to your specific needs and aesthetic preferences․
Furthermore, the satisfaction of crafting a functional and beautiful piece of furniture is immensely rewarding․ Numerous online resources provide step-by-step instructions, making the process accessible even for beginner woodworkers․ It’s a chance to learn new skills and create a lasting heirloom․
Sourcing Materials for Your Farmhouse Table
Strategic material acquisition is key! Successfully executing farmhouse table plans (often available as PDFs) hinges on finding quality lumber and hardware․ Local lumberyards are excellent sources for pine, oak, or even reclaimed wood, offering personalized advice․ Online retailers provide a wider selection of specialized hardware – legs, brackets, and fasteners – crucial for structural integrity․
Consider exploring architectural salvage yards for unique, character-rich reclaimed wood, adding authentic farmhouse appeal․ Comparing prices across suppliers ensures a cost-effective build, while prioritizing durable materials guarantees a long-lasting table․
Wood Selection: Pine, Oak, and Reclaimed Options
Choosing the right wood defines your table’s character! Pine is budget-friendly and easy to work with, ideal for painted farmhouse tables․ Oak offers superior durability and a beautiful grain, perfect for stained finishes․ Reclaimed wood, sourced from barns or old buildings, provides unmatched rustic charm and sustainability․
PDF plans often specify wood types, but feel free to adapt․ Consider wood thickness and availability․ Reclaimed wood may require extra preparation – cleaning and de-nailing – but the aesthetic rewards are significant․ Prioritize kiln-dried lumber to minimize warping․
Hardware Requirements: Legs, Brackets, and Fasteners
Solid hardware is crucial for a stable farmhouse table! Most plans require robust table legs – consider pre-made options or crafting your own․ Metal brackets reinforce corner joints, enhancing durability․ Essential fasteners include wood screws of varying lengths and potentially wood glue for a stronger bond․
PDF plans will detail specific hardware sizes․ Don’t skimp on quality; invest in sturdy components․ Check for rust-resistant coatings if the table will be exposed to moisture․ Having a fastener assortment kit simplifies the build process․
Popular Farmhouse Table Styles
Farmhouse tables boast diverse aesthetics! Traditional X-leg designs offer classic rustic appeal, while pedestal bases create an elegant, space-saving option․ Rectangular tables paired with bench seating maximize space and encourage communal dining․
PDF plans showcase these variations․ Consider your room’s size and décor when choosing a style․ Some plans incorporate breadboard ends for added stability and visual interest․ Explore different leg shapes and apron details to personalize your build․ The available plans cater to various skill levels and preferences․
Traditional X-Leg Farmhouse Table
The X-leg design is a farmhouse staple! PDF plans for this style often detail precise angle cuts for creating the iconic X-shaped legs, ensuring both structural integrity and visual appeal․ Construction typically involves joining two angled pieces of wood, requiring accurate measurements and strong joinery․
Many plans emphasize using robust wood like pine or oak․ Detailed instructions guide builders through assembling the legs and attaching them securely to the tabletop․ This style evokes a timeless, rustic charm, making it a popular choice for farmhouse aesthetics․
Pedestal Base Farmhouse Table
Elegant and space-saving! PDF plans for pedestal base farmhouse tables focus on constructing a sturdy central support․ These plans often include detailed diagrams for building the pedestal itself, frequently utilizing turned legs or a boxed construction for stability․
The tabletop attachment is crucial, requiring strong joinery techniques․ These tables offer a more refined look compared to traditional leg designs․ Plans may suggest using hardwoods for the pedestal to withstand weight and provide lasting durability, enhancing the overall farmhouse aesthetic․
Rectangular Farmhouse Table with Bench Seating
Maximize dining space! PDF plans for rectangular farmhouse tables with benches emphasize creating a cohesive seating arrangement․ These plans detail building both the table and matching benches, often with similar design elements like distressed finishes or planked tops․
Construction focuses on robust table aprons and bench supports for durability․ Plans frequently include dimensions for comfortable bench seating and guidance on integrating the benches seamlessly with the table’s design, fostering a warm, inviting farmhouse atmosphere; Expect detailed cut lists for efficient material usage․
Free Farmhouse Table Plans – Overview
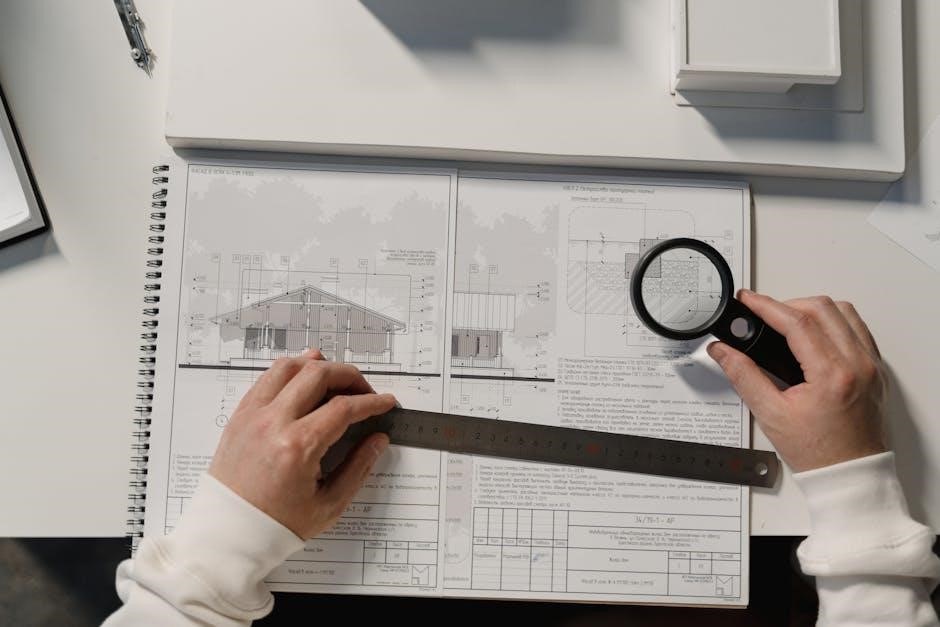
Embark on your build! Numerous websites offer free farmhouse table plans in PDF format, catering to various skill levels․ These plans range from basic rectangular designs to more complex X-leg or pedestal tables․ Many boast tens of thousands of successful builds, proving their accessibility․
Expect detailed material lists, step-by-step instructions, and often, accompanying videos․ Some sites offer plans in exchange for email sign-ups, providing access to a wider library of woodworking projects․ These resources empower DIY enthusiasts to create stunning farmhouse tables without significant upfront costs․
Plan 1: Basic Rectangular Farmhouse Table

A foundational build! This plan focuses on a classic rectangular farmhouse table, ideal for beginners․ Expect straightforward construction utilizing readily available lumber․ The design prioritizes simplicity and functionality, making it a quick and rewarding project․
PDF plans typically detail precise dimensions for the tabletop, legs, and apron․ Wood lists specify board footage needed, minimizing waste․ This basic table serves as an excellent starting point for customization – consider adding a stain, paint, or distressing techniques to personalize your finished piece․
Dimensions and Wood List for Basic Table
Essential measurements for success! A typical basic rectangular farmhouse table measures 6ft long, 3ft wide, and 30 inches high – adaptable to your dining space․ The wood list generally includes: (4) 4×4 posts for legs (approx․ 29” length), (2) 2×6 boards for the long apron sides (72” length), (2) 2×6 boards for short apron sides (36” length), and (5) pine boards for the tabletop (6ft length, varying widths)․

PDF plans will provide precise board footage calculations, ensuring efficient material purchasing․ Consider using pine for affordability or oak for increased durability․
Step-by-Step Construction Guide (Basic Table)
Building begins with the legs! First, cut and sand your 4×4 posts․ Next, assemble the apron using 2×6 boards, securing with wood screws and brackets for stability․ Attach the legs to the apron, ensuring square corners․ Then, lay tabletop boards side-by-side, joining them with wood glue and biscuits or pocket screws․
Finally, attach the assembled tabletop to the apron/leg structure․ PDF plans detail screw placement and offer visual aids for each stage, making this project accessible for beginners․
Plan 2: X-Leg Farmhouse Table
Elevate your space with an X-leg design! This plan focuses on crafting sturdy and visually appealing X-shaped legs, a hallmark of farmhouse style․ Detailed PDF instructions guide you through precise angle cuts and secure joining techniques․ Expect to utilize bracing for enhanced stability and weight distribution․
The plans emphasize accurate measurements and offer tips for achieving a professional finish․ This build requires intermediate woodworking skills, but the result is a beautiful, durable table;
Detailed X-Leg Construction Techniques
Master the art of X-leg joinery! These plans detail precise angle cuts – typically 45 degrees – for creating the X shape․ Emphasis is placed on strong, durable joints using mortise and tenon, or robust pocket hole screws with wood glue․
Bracing is crucial; plans illustrate how to add center supports for stability․ Accurate measurements are paramount to ensure symmetrical legs․ The PDF provides diagrams showing optimal wood selection and techniques for achieving a clean, professional aesthetic, resulting in a visually striking and structurally sound base․
Assembly Instructions for X-Leg Table
Bring your X-leg table to life! The PDF guides you through attaching the pre-assembled X-legs to the tabletop, utilizing robust fasteners and wood glue for a secure bond․ Detailed diagrams illustrate proper alignment and screw placement․
Step-by-step instructions cover ensuring squareness during assembly, preventing wobbling․ The plans emphasize tightening all connections progressively to distribute stress evenly․ Finally, finishing touches like adding aprons for extra support and aesthetic appeal are clearly outlined, completing your beautiful farmhouse table․
Plan 3: Farmhouse Table with Bench Seating
Maximize your dining space! This plan provides detailed instructions for constructing a farmhouse table and coordinating bench seating․ The PDF includes separate wood lists and cut diagrams for both components, ensuring efficient material usage․
You’ll find guidance on bench design, focusing on comfort and stability․ The plans demonstrate how to seamlessly integrate the bench with the table’s overall aesthetic, creating a cohesive dining set․ Expect clear illustrations for leg attachment and apron construction, resulting in a charming, functional dining solution․
Bench Design and Construction Details
Comfort meets rustic style! The bench plans prioritize both aesthetics and durability․ Detailed diagrams illustrate the construction of a sturdy bench frame, utilizing similar joinery techniques as the table for a unified look․
Expect precise measurements for seat dimensions, ensuring comfortable seating for extended periods․ The PDF outlines the process of attaching the seat to the frame, emphasizing stability․ Furthermore, it provides options for adding backrests or armrests, allowing for customization to suit your preferences and space requirements․
Integrating Bench with Table Design
Seamless farmhouse harmony! Successful integration requires careful consideration of scale and proportion․ The plans emphasize maintaining a consistent aesthetic between the table and benches, utilizing matching wood types and finishes․
Detailed instructions guide the positioning of benches relative to the table, ensuring comfortable legroom and ease of access․ Considerations for overhang and bench length are provided․ The PDF also suggests strategies for attaching the benches to the table, either permanently or with removable brackets, offering flexibility in your dining arrangement․
Advanced Techniques for Farmhouse Tables
Elevate your build! Beyond basic construction, these plans delve into techniques for a truly professional finish․ Discover methods for achieving a beautifully distressed look, adding character and age to your farmhouse table․
Explore the benefits of incorporating breadboard ends, enhancing stability and preventing warping․ Detailed guidance is provided on joinery techniques, stain application, and protective sealing․ These advanced steps, outlined in the PDF resources, transform a simple project into a heirloom-quality piece of furniture;

Distressing and Finishing Techniques
Achieve authentic farmhouse charm! The provided PDF plans detail various distressing methods, from light sanding for a subtly aged appearance to more aggressive techniques using tools and specialized finishes․
Learn how to strategically apply paint, stain, and sealers for durability and aesthetic appeal․ Explore techniques like dry brushing, layering colors, and using antiquing glazes․ Mastering these finishing touches transforms your table, giving it a unique, rustic character that perfectly complements farmhouse décor, as showcased in available resources․
Adding Breadboard Ends for Enhanced Stability
Prevent warping and add visual appeal! Detailed within some farmhouse table PDF plans is the technique of incorporating breadboard ends․ These are pieces of wood attached to the ends of the tabletop, running perpendicular to the grain․
This construction method accommodates wood movement, preventing cracking and warping over time․ The plans illustrate proper joinery techniques – often mortise and tenon – ensuring a strong and lasting connection․ Breadboard ends also contribute to the classic farmhouse aesthetic, enhancing both the table’s durability and its rustic charm․
Finding More Farmhouse Table Plans (PDF Resources)
Expand your options! While this guide offers several farmhouse table plans in PDF format, numerous online resources provide additional designs․ Websites dedicated to woodworking and DIY projects frequently host free and premium plans․
A quick search reveals collections of 53+ DIY table plans, catering to various skill levels and styles․ Many plans are downloadable as PDFs, offering detailed instructions and material lists․ Explore online communities and forums for shared plans and builder experiences, unlocking a wealth of farmhouse table inspiration․
Workbench Plans & Their Relevance to Table Building
A solid foundation is key! Building a farmhouse table requires a stable workspace․ Examining workbench plans, even those for updated designs addressing initial stability issues, provides valuable insights․
The techniques used in workbench construction – robust joinery, sturdy leg attachments, and overall structural integrity – directly translate to successful table building․ A well-built workbench ensures accurate cuts and secure assembly․ Consider adapting workbench plans to create a dedicated table-building station, enhancing precision and efficiency throughout your project․
Farmhouse Table Dimensions & Sizing Guide
Perfect fit for your space! Determining the ideal farmhouse table size is crucial․ Consider your room’s dimensions; allow at least 36-48 inches of walking space around the table․ Standard farmhouse table heights typically range from 28 to 30 inches․
For comfortable seating, allocate 24 inches of width per person․ Rectangular tables commonly range from 6 to 8 feet long․ Carefully review plans, as dimensions vary․ Prioritize functionality and ensure the table complements, rather than overwhelms, your dining area․
Determining Table Size Based on Room Dimensions
Maximize your space! Begin by measuring your dining room’s length and width․ A good rule of thumb is to leave at least 36 inches – ideally 48 inches – of clearance around all sides of the table for comfortable movement․
Visualize the table within the room; use painter’s tape to mark out potential sizes․ Consider existing furniture and traffic flow․ Smaller rooms benefit from narrower, rectangular tables, while larger spaces can accommodate wider or even square designs․ Prioritize a balanced and functional layout․
Standard Farmhouse Table Heights
Comfort is key! The typical height for a farmhouse table, mirroring standard dining table dimensions, falls between 28 and 30 inches․ This allows for comfortable seating with standard 18-inch high dining chairs․
If you plan to incorporate bench seating, consider a slightly lower table height – around 28 inches – for easier access․ Counter-height farmhouse tables, popular for kitchen islands, generally range from 36 to 42 inches, requiring appropriately sized stools․ Always prioritize ergonomic comfort when selecting your table’s height․
Cost Breakdown: Building vs․ Buying
Save money and customize! Building a farmhouse table yourself, utilizing free PDF plans, can significantly reduce costs compared to purchasing a pre-made one․ Material expenses (wood, hardware) typically range from $150-$500, depending on size and wood type․
Purchased farmhouse tables often start around $500 and can easily exceed $1000+․ DIY allows for material selection based on budget, while buying offers convenience․ Factor in tool costs if you lack essential equipment; renting is an option!
Safety Precautions When Building a Farmhouse Table
Prioritize safety during construction! Always wear safety glasses to protect your eyes from flying debris when cutting or sanding wood․ Utilize ear protection to mitigate noise exposure from power tools․ A dust mask is crucial to avoid inhaling wood particles․
Securely clamp wood pieces before cutting or drilling․ Be mindful of power cord placement and avoid working in damp conditions․ If unfamiliar with tools, seek guidance or watch instructional videos before starting․ Proper ventilation is key when applying finishes․
Finishing Touches: Stains, Paints, and Sealers
Elevate your table’s aesthetic! Choose stains to highlight wood grain, paints for vibrant color, or a combination․ Water-based stains offer low VOCs, while oil-based stains provide richer tones․ Consider distressing techniques for a vintage look․
Apply multiple thin coats of sealer – polyurethane or varnish – for durability and protection against spills․ Ensure proper ventilation during application․ Select a sheen level (matte, satin, gloss) based on desired appearance and usage․ Allow adequate drying time between coats for optimal results․

Farmhouse Table Maintenance and Care
Preserve your investment! Regular dusting and wiping with a damp cloth prevent buildup․ Avoid harsh chemicals; use wood-specific cleaners․ Coasters and placemats protect against spills and heat․ Periodically reapply sealer to maintain protection, especially on frequently used surfaces․
Address scratches promptly with touch-up markers or wax sticks․ For deeper damage, consider light sanding and re-staining․ Inspect legs and joints annually, tightening fasteners as needed to ensure stability and longevity of your beautiful, handcrafted farmhouse table․
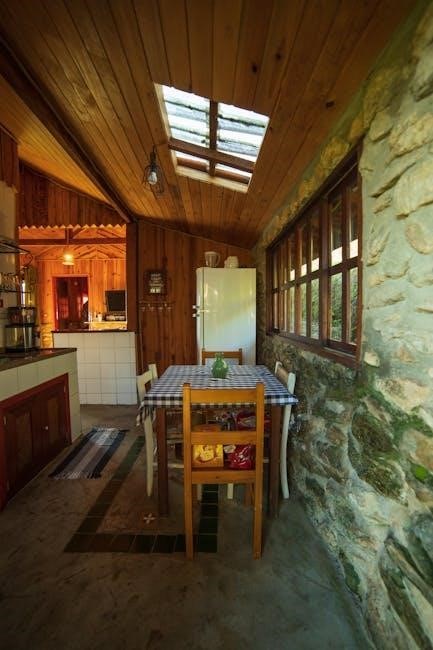
Where to Find Accommodation with Farmhouse Tables (West Lothian Example)
Experience farmhouse living! West Lothian, UK, offers charming homestays featuring farmhouse-style dining․ Search online platforms for accommodations boasting open-plan living spaces, often including a farmhouse table, comfortable sofas, and smart TVs․
These rentals frequently provide free parking and showcase rustic décor․ Explore options for a cozy getaway, enjoying meals around a beautiful farmhouse table after building your own using plans from this guide․ Reviews from previous guests can help you select the perfect stay!
Resources for Wood Lazy Susans & Kitchen Organizers (Related Items)
Enhance your farmhouse kitchen! Complement your newly built farmhouse table with practical and stylish kitchen accessories․ Explore online retailers for wood lazy susans – perfect for condiments or serving – and various kitchen organizers․
These turntables, often found for cabinets, add a rustic touch․ Consider options to maximize space and maintain the farmhouse aesthetic․ Completing your kitchen with these items elevates the overall charm and functionality, mirroring the handcrafted feel of your table․