Ninja Foodi Slow Cooking: A Comprehensive Guide
Ninja Foodi offers versatile 8-in-1 functionality, including slow cooking, simplifying meal preparation. Explore guides and recipes designed for Ninja Foodi’s unique capabilities,
enhancing your culinary experience.
Understanding Your Ninja Foodi’s Slow Cooking Function
The Ninja Foodi’s slow cooking function distinguishes itself by offering a multi-functional approach, going beyond traditional slow cookers. Many models, like the MC1001UK Series Ninja Foodi PossibleCooker, integrate slow cooking with up to eight other functions in a single appliance. This allows for searing/sautéing before slow cooking, developing deeper flavors without needing separate cookware.
Unlike conventional slow cookers, the Ninja Foodi often features more precise temperature control and faster cooking times. It’s crucial to understand that direct conversion of traditional recipes isn’t always one-to-one; adjustments may be needed. The Ninja Foodi’s design prioritizes efficiency, potentially reducing cooking durations while maintaining optimal results. Utilizing the sear/sauté function beforehand builds a flavorful base, enhancing the final dish.
Refer to your specific model’s quick start guide for detailed instructions, as features can vary.
Ninja Foodi Models with Slow Cooking Capabilities
Several Ninja Foodi models boast integrated slow cooking functionality, catering to diverse culinary needs. The Ninja Foodi PossibleCooker (MC1001UK Series) is specifically designed with slow cooking as a core feature, offering up to 12 hours of cooking time. This 8-in-1 appliance combines slow cooking with other methods like steaming and roasting.
Furthermore, many Ninja Multicookers also include a slow cook setting, providing versatility in a single unit. These models allow users to transition seamlessly between pressure cooking, air frying, and slow cooking. The 8L Ninja Foodi PossibleCooker is a popular choice, praised by Amazon shoppers for its efficiency and multi-functionality.
When selecting a model, consider the capacity and additional features. The Ninja Woodfire Premium Grill, while primarily a grill, can also benefit from slow cooking techniques when paired with compatible accessories. Always consult the product specifications to confirm slow cooking capabilities.
Comparing Ninja Foodi Slow Cooking to Traditional Slow Cookers
Ninja Foodi slow cooking distinguishes itself from traditional slow cookers through its multi-functionality and speed. While conventional slow cookers primarily focus on low and slow cooking, the Ninja Foodi combines this with pressure cooking, air frying, and searing – offering greater versatility.
A key advantage is the Ninja Foodi’s sear/sauté function, allowing for browning meats directly in the pot before slow cooking, enhancing flavor development. Traditional slow cookers typically require a separate pan for this step. The Ninja Foodi can also reduce cooking times, achieving similar results faster.
However, traditional slow cookers often excel at maintaining consistent low temperatures over extended periods. The Ninja Foodi, while capable, may require more attention to liquid levels and temperature settings to prevent sticking or drying; Ultimately, the best choice depends on your cooking style and desired level of control.
Getting Started with Slow Cooking in Your Ninja Foodi
Ninja Foodi’s slow cooking is user-friendly! Familiarize yourself with the control panel, safety precautions, and optimal cook times for delicious, effortless meals every time.
Initial Setup and Safety Precautions
Before your first slow cooking adventure with the Ninja Foodi, ensure proper setup. Place the appliance on a stable, heat-resistant surface away from flammable materials. Always inspect the cooking pot for any damage before use.
Safety is paramount. Never operate the Ninja Foodi with a damaged cord or plug. Avoid immersing the unit in water or other liquids. Do not overfill the cooking pot, leaving space for expansion during cooking.
When handling hot components, always use oven mitts or pot holders. Be cautious of steam release, especially during pressure cooking functions (though not directly related to slow cooking, awareness is key). Keep the appliance out of reach of children. Refer to the Ninja Foodi’s instruction manual for a complete list of safety guidelines and warnings. Proper setup and adherence to safety precautions will ensure a safe and enjoyable slow cooking experience.
Understanding the Control Panel for Slow Cooking
The Ninja Foodi’s control panel for slow cooking is designed for intuitive operation. Locate the “Slow Cook” button – pressing it activates the slow cooking function. You’ll typically find options to select “Low” or “High” temperature settings.
Time adjustment is crucial; use the “+” and “-” buttons to set your desired cook time, often ranging from 30 minutes to 12 hours. Some models feature a delay start option, allowing you to schedule cooking in advance.
Familiarize yourself with any indicator lights that display the current cooking status (e.g., warming, cooking). The “Stop/Cancel” button will immediately halt the slow cooking process; Consult your specific Ninja Foodi model’s manual for a detailed explanation of each button and function. Mastering the control panel unlocks the full potential of your appliance for effortless slow cooking.
Choosing the Right Cook Time and Temperature
Selecting the appropriate cook time and temperature is vital for successful Ninja Foodi slow cooking. “Low” is best for all-day cooking (6-8 hours), tenderizing tougher cuts of meat. “High” offers faster cooking (3-4 hours), suitable for quicker meals or when you’re short on time.
Consider the recipe – traditional slow cooker recipes often need adjustment. Start with the lower end of the recommended time range and check for doneness. Remember, the Ninja Foodi often cooks faster than conventional slow cookers due to its efficient heating.
For safety, avoid exceeding the maximum recommended cook time (typically 12 hours). Always ensure food reaches a safe internal temperature. Experimentation is key; note your results to refine your timing for future meals.
Essential Slow Cooking Techniques for Ninja Foodi
Mastering techniques like searing before slow cooking enhances flavor. Converting recipes requires adjusting liquid levels and cook times, while understanding “Low” versus “High” settings is crucial.
Low vs. High Slow Cooking Settings – What’s the Difference?
Understanding the difference between “Low” and “High” settings on your Ninja Foodi is vital for successful slow cooking. The “Low” setting typically cooks food over a longer period, around 6-8 hours, at a lower temperature – generally between 170-200°F (77-93°C). This gentle heat is ideal for tougher cuts of meat, allowing them to become incredibly tender.
Conversely, the “High” setting cooks food faster, usually in 3-4 hours, at a higher temperature, around 280-300°F (138-149°C). While quicker, it can sometimes result in drier or less tender results, especially with leaner proteins. Generally, if a recipe calls for “Low” for an extended time, using “High” will require reducing the cooking time significantly – often by half.
However, the Ninja Foodi’s efficiency means these times may vary. It’s always best to check for doneness using a meat thermometer and adjust cooking time accordingly. Remember, slow cooking is about low and slow, prioritizing tenderness and flavor development.

Converting Traditional Slow Cooker Recipes
Adapting conventional slow cooker recipes for your Ninja Foodi is generally straightforward, but requires some adjustments due to its increased efficiency. A common rule of thumb is to reduce the cooking time by approximately 25-30% when switching from a traditional slow cooker to the Ninja Foodi. This is because the Ninja Foodi tends to cook faster, even on the “Low” setting.
For example, if a recipe calls for 8 hours on low in a standard slow cooker, try 5-6 hours on low in your Ninja Foodi. Always monitor the food’s internal temperature to ensure it’s fully cooked. Liquid levels may also need slight adjustments; start with the amount specified in the original recipe and add more if needed, as the Ninja Foodi retains moisture well.
Remember to consider the ingredients – tougher cuts of meat might still benefit from a longer cooking time, even in the Ninja Foodi. Experimentation and checking for doneness are key to perfecting your converted recipes.
Using the Ninja Foodi’s Sear/Sauté Function Before Slow Cooking
Leveraging the Ninja Foodi’s Sear/Sauté function before slow cooking significantly enhances flavor development. This step allows you to brown meats and sauté vegetables directly in the cooking pot, creating a rich, caramelized base for your dish – something traditional slow cookers can’t easily achieve.
To begin, select the Sear/Sauté function and add a small amount of oil. Once heated, brown your meat in batches to avoid overcrowding, ensuring each piece develops a good sear. Remove the meat and then sauté your vegetables until softened. Deglaze the pot with a liquid like broth or wine, scraping up any browned bits from the bottom – these bits are packed with flavor!
Finally, return the meat and vegetables to the pot, add the remaining ingredients, and switch to the Slow Cook function. This one-pot method minimizes cleanup and maximizes the depth of flavor in your slow-cooked meals.
Popular Recipes for Ninja Foodi Slow Cooking
Discover delicious recipes like Tater Tot Casserole, flavorful Pulled Pork, and comforting Beef Stew, all optimized for your Ninja Foodi’s slow cooking capabilities.
Slow Cooker Tater Tot Casserole
Creating a comforting Tater Tot Casserole in your Ninja Foodi is surprisingly simple! Begin by browning one pound of ground beef using the Sear/Sauté function, then drain any excess grease. In a large bowl, combine the browned beef with a can of cream of mushroom soup, a packet of ranch seasoning, and a cup of frozen mixed vegetables.
Pour this mixture into your Ninja Foodi’s cooking pot. Next, evenly distribute two cups of frozen tater tots over the top. Select the “Slow Cook” function and cook on Low for 4-6 hours, or on High for 2-3 hours, until the casserole is bubbly and the tater tots are golden brown.
For a cheesier casserole, sprinkle a cup of shredded cheddar cheese over the tater tots during the last 30 minutes of cooking. This recipe perfectly showcases the Ninja Foodi’s versatility, offering a convenient and delicious meal with minimal effort!
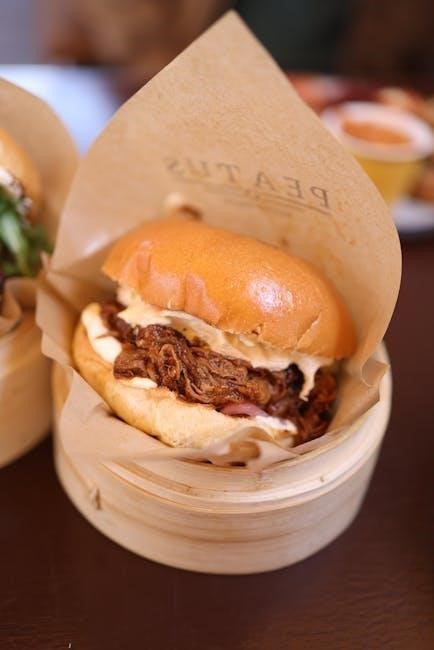
Pulled Pork Recipe for Ninja Foodi
Achieving tender, flavorful pulled pork is effortless with your Ninja Foodi! Start by searing a 3-4 pound pork shoulder (butt) using the Sear/Sauté function to develop a rich crust – this step is crucial for flavor. Season generously with your favorite BBQ rub, ensuring all sides are coated.
Place the seared pork shoulder into the Ninja Foodi pot. Add one cup of chicken broth or apple cider vinegar, and a tablespoon of brown sugar. Secure the lid and select the “Slow Cook” function. Cook on Low for 8-10 hours, or on High for 4-6 hours, until the pork is fall-apart tender.
Once cooked, shred the pork with two forks. Stir in your preferred BBQ sauce. Serve on buns with coleslaw for a classic pulled pork sandwich. The Ninja Foodi’s slow cooking function delivers incredibly moist and flavorful results, rivaling traditional methods!
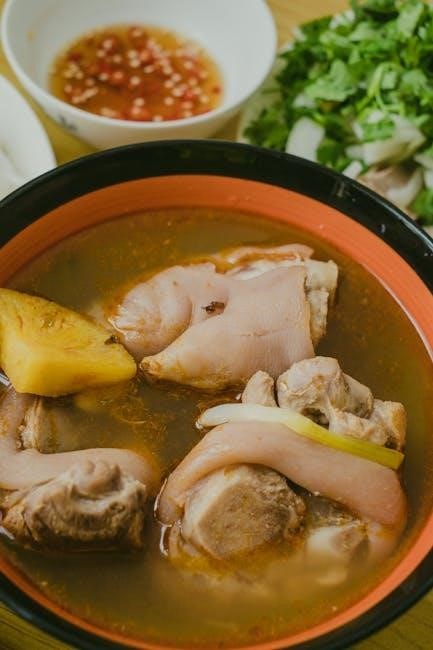
Beef Stew in the Ninja Foodi Slow Cooker
Creating a hearty beef stew is simple with the Ninja Foodi’s slow cooking capabilities. Begin by searing 1.5 pounds of beef chuck, cut into 1-inch cubes, using the Sear/Sauté function. This builds a deep, savory base for your stew. Remove the beef and set aside.
Add 1 tablespoon of olive oil to the pot, then sauté 1 chopped onion, 2 carrots (sliced), and 2 celery stalks (chopped) until softened. Return the beef to the pot. Add 4 cups of beef broth, 1 can (14.5 oz) of diced tomatoes, 2 potatoes (cubed), and seasonings like bay leaf, thyme, and salt & pepper.
Select the “Slow Cook” function and cook on Low for 6-8 hours, or on High for 3-4 hours, until the beef and vegetables are tender. Remove the bay leaf before serving. The Ninja Foodi ensures a flavorful and tender beef stew with minimal effort!

Tips and Tricks for Perfect Results
Maximize your Ninja Foodi slow cooking success by preventing sticking, adjusting liquid levels, and utilizing liners for effortless cleanup, ensuring consistently delicious meals.
Preventing Food from Sticking
Ensuring your culinary creations don’t adhere to the Ninja Foodi’s inner pot is crucial for easy serving and cleanup. A key strategy involves lightly coating the pot with cooking spray or a small amount of oil before adding ingredients. This creates a barrier, minimizing sticking, particularly with proteins and starchy vegetables.
Another effective technique is layering ingredients strategically. Placing vegetables beneath meats can help prevent direct contact with the hot pot surface. Furthermore, stirring occasionally during the initial stages of slow cooking, if possible without disrupting the process too much, can redistribute ingredients and prevent them from settling and sticking.
Remember that certain foods, like sugary sauces or milk-based recipes, are more prone to sticking. Increased monitoring and potentially reducing the cook time can mitigate this issue. Utilizing the sear/sauté function briefly before slow cooking can also create a slight crust, reducing the likelihood of sticking during the longer slow cooking process.
Adjusting Liquid Levels for Optimal Cooking
Maintaining the correct liquid level is paramount for successful slow cooking in your Ninja Foodi. Unlike traditional slow cookers, the Ninja Foodi tends to retain moisture more effectively due to its sealed environment. Therefore, recipes often require less liquid than conventional slow cooker instructions suggest.
As a general guideline, aim to fill the pot no more than two-thirds full. For most recipes, covering ingredients with liquid about halfway is sufficient. Excess liquid can result in a diluted flavor and a less desirable texture. Conversely, insufficient liquid can lead to burning or drying out.
Consider the ingredients; those releasing moisture during cooking, like vegetables, require less added liquid. If adapting a traditional recipe, reduce the liquid by approximately 25-50%. Monitoring the consistency during cooking allows for adjustments – adding small amounts of liquid if needed, but avoiding overdoing it.
Using Liners for Easy Cleanup
Simplifying the cleanup process after slow cooking in your Ninja Foodi is easily achieved with the use of slow cooker liners. These disposable bags fit inside the cooking pot, creating a barrier between the food and the surface, significantly reducing scrubbing and soaking time.
When using a liner, ensure it’s specifically designed for slow cookers and is appropriately sized for your Ninja Foodi’s pot. Carefully place the liner inside, folding over the top edges to secure it. Add your ingredients directly into the liner, and cook as usual.
After cooking, simply lift the liner out of the pot, tie it closed, and dispose of it. This method is particularly beneficial for sticky or messy recipes like chili or pulled pork. However, always check the liner’s instructions to confirm its compatibility with your Ninja Foodi and avoid direct contact with the heating element.
Maintenance and Care
Regular cleaning ensures your Ninja Foodi remains in optimal condition. Thoroughly wash the pot after each use, and store the appliance in a cool, dry location.
Cleaning Your Ninja Foodi After Slow Cooking
After slow cooking, allow the Ninja Foodi and its inner pot to cool completely before cleaning. Remove the pot and any accessories, like the crisping basket, and wash them with warm, soapy water. The pot is often dishwasher safe, but always check your model’s manual for confirmation.
For stubborn food residue, a gentle scrub with a non-abrasive sponge is recommended. Avoid using harsh chemicals or scouring pads, as these can damage the non-stick coating. Wipe down the exterior of the Ninja Foodi with a damp cloth. Pay attention to the heating element and control panel, ensuring they are free from splatters.
The pressure release valve and sealing ring should also be removed and cleaned separately. Ensure these are thoroughly dried before reassembling. Proper cleaning extends the life of your Ninja Foodi and maintains optimal performance for future slow cooking adventures.
Proper Storage of Your Ninja Foodi
Proper storage of your Ninja Foodi ensures its longevity and readiness for your next culinary creation. Before storing, ensure the appliance is completely cool and dry. Detach all removable parts – the cooking pot, crisping basket, and any lids – and store them separately to prevent scratches or damage.
If you have the original packaging, utilizing it for storage is ideal, providing protection during infrequent use. Alternatively, store the Ninja Foodi in a clean, dry location, away from direct sunlight and extreme temperatures. Avoid stacking heavy items on top of the appliance.
Keep the sealing ring clean and store it separately to prevent odor absorption. Regularly check for any signs of wear and tear. Following these simple storage guidelines will help maintain your Ninja Foodi in excellent condition for years of reliable slow cooking and beyond.
Troubleshooting Common Slow Cooking Issues
Food not cooking fast enough? Ensure the lid is properly sealed; a loose fit releases heat. Verify you’ve selected the correct slow cooking setting – Low or High – and adjusted the cook time accordingly. Remember, Ninja Foodi may cook faster than traditional slow cookers.
Food sticking to the pot? Utilize the Sear/Sauté function before slow cooking to brown meats and build flavor, creating a natural release layer. Adding a small amount of oil or liquid can also prevent sticking.
Error messages appearing? Consult the Ninja Foodi manual for specific error code explanations. Often, a simple reset – unplugging and replugging the appliance – can resolve minor glitches. If issues persist, contact Ninja customer support for assistance. Proper usage and maintenance minimize these common problems, ensuring successful slow cooking.